How to Crochet a Star

Craft a Star with Ease: How to Crochet a Star

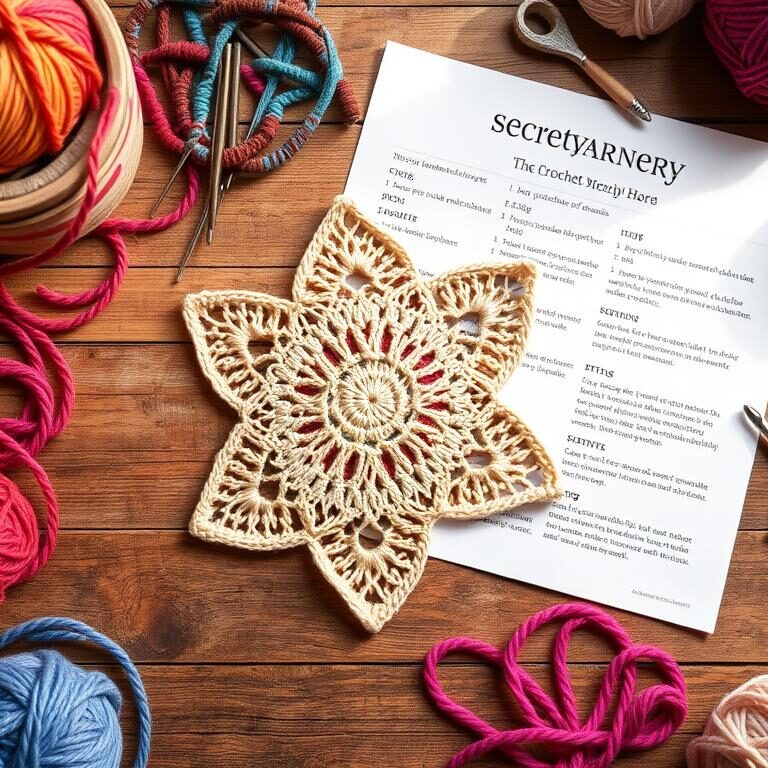
Ever thought about making a star from yarn with just a few stitches? You’re in the right spot! This guide will show you how to crochet a star easily. It’s great for holiday decorations or personal crafts. Let’s explore the fun of making your own DIY crochet star!

Brittany from B.Hooked Crochet has a beginner-friendly pattern for us. It’s fun for both newbies and seasoned crocheters. You can use medium-weight yarn for a 4-inch star or try different yarns and hooks for unique sizes.

Are you ready to add a touch of whimsy to your crafting repertoire? If so, you’re in for a treat! In this guide, we’ll explore how to crochet a star with ease, a delightful project that brings joy to crocheters of all skill levels. Whether you’re a complete beginner or a seasoned pro looking to try something new, this Crochet Star DIY guide will walk you through creating beautiful, star-shaped designs that can be used for decorations, gifts, or even as charming embellishments for other projects. 

With just a few basic stitches and some medium-weight yarn, you can whip up a 4-inch star in no time, or mix it up by experimenting with different yarns and hooks for unique sizes and textures. Let’s dive into the enchanting world of crochet and discover the magic of crafting your very own Crochet Star Pattern!

Key Takeaways

  • The crochet star pattern takes approximately 10 minutes to complete.
  • The finished size is 4 inches wide using medium-weight yarn and a 5.0mm hook.
  • The pattern is adjustable for different sizes by varying yarn weights and hook sizes.
  • Standard US crochet terminology is used, including Ch (Chain) and Dc (Double Crochet).
  • A handy video tutorial is available on YouTube for visual learners.

Introduction to Crocheting a Star

Learning to crochet a star is a fun and rewarding journey. A Step-by-Step Crochet Star guide makes it easy for beginners. It breaks down the process into simple steps, perfect for a Beginner Crochet Star Tutorial.

The star stitch is a key part of our project. It starts with 22 stitches. Each row has a beginning, star stitches, and an end, making it easy to follow.

Making crochet stars is a fun and affordable hobby. It uses leftover yarn and tools, keeping costs low. These stars can add beauty to many items, like holiday decorations and baby blankets.

The pattern works for both right and left-handed crocheters. It’s important to remember that turning chains don’t count as stitches. This ensures your star turns out right every time. With just 11 steps, this tutorial helps beginners make beautiful stars.

Materials and Tools Needed for a Crochet Star

Starting a crochet star project is easy with the right crochet star materials. Here’s a quick list of what you need for this fun project:

  • Yarn: I suggest Flax & Twine Daytime Linen in Fingering Weight in Stone. You can also buy kits in different yarn sizes. Some good yarns include:
    • Style Craft Bambino DK in Clotted Cream – finished size: 3 inch X 3 inch (using a 4mm hook)
    • James C Brett Twinkle DK in Gold – finished size: 3 inch X 3 inch (using a 4mm hook)
    • Rico Fashion Cotton DK Metallise DK in White Gold (002) – finished size: 3.5 inches X 3.5 inches (using a 4mm hook)
    • Paintbox Simply Super Chunky in Champagne White – finished size: 7 inches X 7 inches (using a 9mm hook)
    • Paintbox Simply Super Chunky in Champagne White & Hobbii Umami Scarlet (17) – finished size: 6 inches X 6 inches (using a 9mm hook)
  • Crochet Hook: You’ll need a 2.35mm crochet hook, but kits might have different sizes. Here are some options:
    • 4mm hook for medium projects
    • 6.5mm hook for larger, more pronounced stars
    • 9mm hook for extra large stars
  • Tools: Make sure you have scissors and a yarn needle too.

Having all these crochet star materials ready will help you follow the crochet star DIY guide. Let’s look at how different yarns and hooks change the result:

Yarn Type Hook Size Finished Size
Style Craft Bambino DK in Clotted Cream 4mm 3 inch X 3 inch
James C Brett Twinkle DK in Gold 4mm 3 inch X 3 inch
Paintbox Simply Super Chunky in Champagne White 9mm 7 inch X 7 inch
Paintbox Simply Super Chunky & Hobbii Umami Scarlet (17) 9mm 6 inch X 6 inch

Get your crochet star materials and start with the crochet star DIY guide. You’ll make beautiful, versatile crochet stars for your next project!

Choosing the Right Yarn and Hook

Choosing the right yarn and hook is key when making your Crochet Star Pattern. The yarn’s texture and weight greatly affect your star’s look. I love trying out different yarns to see their unique effects.

Types of Yarn

Medium-weight yarn is best for a perfect crochet star. It’s easy to work with and looks great when finished. Brittany likes using Bernat Maker yarn with an 8mm hook for a sturdy star.

You can also try different yarn textures like fluffy Homespun or super bulky Go For Faux. They offer flexibility for various styles.

Feel free to play with different textures and colors for unique stars. When choosing yarn for crochet star patterns, mixing yarn weights like DK, Bulky, and Worsted can create stunning combinations.

Hook Sizes

The right hook size goes with your yarn. Using a hook size larger than recommended can prevent curling and improve your star’s look. For example, an 8mm hook with Bernat Maker yarn makes a star with perfect structure.

Always check the yarn’s ball band for recommended hook sizes. This ensures compatibility and the best results for your Crochet Star Pattern.

In conclusion, the right yarn and hook size make your crochet process easier and your star more appealing. With practice and experimentation, you’ll find the perfect match for your projects.

How to Crochet a Star: Step-by-Step Tutorial

Making a crochet star is fun and easy with our guide. It has two main rounds, making it quick and simple for everyone. Follow this step-by-step guide to make your star.

First, get your supplies ready: size 5 bulky yarn, a size K (6.50 mm) crochet hook, and more. You’ll need a yarn needle, scissors, fabric stiffener, jute cord, cardboard, plastic wrap, and rust-proof pins. These are key for a perfect star.

The pattern uses American crochet terms. You’ll learn basic stitches like the chain (ch), double crochet (dc), and more. Start with a magic loop, chain 3, and then do 9 double crochets. This makes the base of your star.

In Round 2, the magic unfolds. Chain 1 and single crochet in the same spot. Then, use double crochet, treble crochet, and chains to make 5 star points.

The Crochet Star Video Tutorial is a great help. It shows each step for both right and left-handed crafters. Watching it with the written guide helps both visual and auditory learners.

After crocheting, block your star. Mix fabric stiffener with water, then shape your star on a mat or cardboard. Secure it with pins and let it dry for hours.

Finishing a crochet star is very rewarding. Try different yarn colors and sizes to make beautiful stars. They’re great for decoration.

Simple Crochet Star Pattern Instructions

The Easy Crochet Star Pattern is perfect for both new and experienced crafters. It has only two rounds, making it great for beginners. Here’s a simple guide to help you start.

Round 1: Making the First Loop

Start by making a ring with chain stitches. This ring is the base of your star:

  1. Begin with a slip knot and chain 4.
  2. Join with a slip stitch (sl st) to form a ring.
  3. Chain 3 (this counts as your first double crochet).
  4. Work 15 double crochets (dc) into the ring.
  5. Join with a slip stitch to the top of the beginning chain 3.

Round 2: Forming the Star Points

In Round 2, you’ll make the star’s points:

  1. Chain 5 (this counts as the first treble crochet and chain 1 space).
  2. In the same stitch: Work 2 treble crochets (tr), 1 double crochet (dc), 1 half-double crochet (hdc), and 1 single crochet (sc).
  3. Skip the next stitch, and in the following stitch, repeat the sequence of 1 sc, 1 hdc, 1 dc, 2 tr, and chain 1.
  4. Repeat step 3 around to form all 5 points.
  5. Join with a slip stitch to the first chain 5 space.

Once you’ve finished, weave in the ends for a neat look. This pattern is easy and beautiful. You can change the yarn and hook size to make it your own. Try blocking the star to make it look even sharper.

Tips for Perfecting Your Crochet Star

To get your crochet star just right, remember a few key tips. First, carefully count your stitches in each round. This keeps your pattern tight and your star symmetrical.

Playing with hook sizes and yarn weights is also important. Changing these can make your star bigger or smaller, without altering the pattern. A smaller hook and thinner yarn make a delicate star. A larger hook and thicker yarn make it more substantial.

Don’t overlook the importance of gauge and finished size checks. Even though gauge isn’t always necessary, it can affect your star’s look and size. A quick gauge check before starting can save you time and ensure your star turns out as you hoped.

Crocheting Tips

For detailed steps on making a perfect crochet star and more tips, see this comprehensive tutorial.

Aspect Tips for Perfection
Stitch Counting Consistently count your stitches in each round to maintain symmetry.
Hook & Yarn Adjustments Experiment with different hook sizes and yarn weights to achieve the desired star size.
Gauge Checks Even if not mandatory, gauging ensures the final product meets your expectations.

Enjoy the journey and feel free to experiment with different techniques. Whether for holidays or a mobile, each star can be a unique piece of art.

Remember, crochet stars are versatile. They can be ornaments, appliques, or garlands, among other things. Happy crocheting!

Different Uses for Crochet Stars

Crochet stars are very versatile. They can add a personal touch to your home, festive settings, or craft projects. You can make small or large stars, depending on your project.

Decorative Ideas

Decorative crochet stars are great for many decor projects. They can be turned into festive garlands, wreaths, or even coasters:

  • Crochet star garlands: Use lightweight yarn to make garlands with big and small stars. You can turn them into ornaments by adding a chain loop.
  • Star wreaths: They’re perfect for patriotic displays. You can add flags to the stars for a festive look.
  • Star coasters: These coasters are trendy and functional. They have six sections and take two rounds to make.

Craft Projects

Crochet stars are not just for decoration. They can also be used to make unique gifts or household items. Here are some examples:

Project Description
Bernat Crochet Star Baby Blanket It’s great for beginners because of its easy rounds.
Crochet Starshine Blanket This blanket is challenging but rewarding. It’s part of the Hugs & Kisses Series.
Crochet Stars and Stripes Forever Wreath This wreath has 4 sets of 3 stars and 4 American flags. It’s perfect for patriotic displays.
Crochet Star Throw This throw uses diamond shapes. It’s simple to make.
Crochet Radiating Star Throw This throw is big, with a 60″ diameter. It uses Bernat Super Value Big Stripes in Warm Patina.

There are endless possibilities with crochet star projects. You can keep making stars to use in your projects.

How to Vary the Size of Your Crochet Star

Creating a unique crochet star means you can change its size. You can do this by using different yarn weights and hook sizes. For example, using a thicker yarn like Whims Merino with a big hook makes the star bigger.

Crochet Star Size Variation

For a smaller star, use thin yarn and a smaller hook. This method helps you get precise results. Crocheting with different yarn weights lets you customize your star in many ways.

Star Variation Type Stitch Count Hook Size Yarn Types
Small Star 10 half double crochets 4mm Whims Merino
Regular Star 35 stitches Furls Cookies and Cream Streamline Swirl (size H) Wool of the Andes Worsted
Large Star 50 stitches 8mm Whims Merino
Captain America Shield 60 stitches 8mm Wool of the Andes Worsted

Crocheting with different yarn weights lets you explore crochet star size variation deeply. For a Small Star, stop at five loops on the hook. This makes the star smaller. For a Big Star, pick up an extra loop to make it bulkier.

Knowing these variations makes your crochet projects more creative and flexible. You can easily make stars of any size.

Finishing Touches: Blocking and Stiffening Your Star

Finishing your crochet star with blocking and stiffening makes it look better and last longer. These steps make your star look polished and keep its shape for years.

Blocking Your Star

Blocking is key to getting your crochet star just right. You can use simple finger adjustments or wet-blocking. It makes your star look sharp and neat.

Block your star by pinning it on a foam board or mat. Make sure each point is spread out evenly.

  • Use approximately 54 pins for a 6-point star.
  • The size range of crocheted stars usually falls between 3.5″ to 4″ in diameter with size 10 thread.
  • The average number of pins required per star is around 60.

After pinning, lightly spray the star with water or use a damp cloth. Let it dry completely, which might take up to 24 hours.

Stiffening Techniques

Wondering how to stiffen crochet stars? There are many ways to make your stars firm. One method is mixing PVA glue with water. Soak your star in this solution, then pin it back onto your blocking board.

  • Time required per star stiffening: 15-20 minutes.
  • Drying time for stiffened stars: Up to 24 hours.
  • Number of stars stiffened in an average tutorial: 9.

Another option is using spray starch. It gives a stiff finish but might need reapplication after washing.

For more beginner crochet projects and tutorials, check out this comprehensive guide.

Blocking and Stiffening Aerosol Sprays Price Volume Drying Time User Rating
Aleene’s Stiffen-Quick $5.49 8 fl oz 24 hours 4.7/5
Stiffy by Plaid $4.99 12 fl oz Up to 36 hours 4.5/5
Mary Ellen’s Best Press $6.99 16 fl oz 24 hours 4.8/5

Mastering these crochet star finishing techniques will help you create beautiful, lasting decorations for any season.

Conclusion

Finishing your crochet star project shows how simple and creative it can be. You’ve turned basic yarn and a hook into a beautiful star in just 10 minutes. This project lets you show off your skills and personal style, whether making a small or large star.

Now, you can decorate your home or give these stars as gifts. They’re perfect for Christmas decorations or baby blankets. You’ve made something special with just yarn and a hook.

If this guide inspired you, there’s more to explore. Check out this tutorial for more star patterns. Each star is a small victory and a lovely addition to your space. Happy crocheting, and may your stars bring joy and light.

FAQ

What materials and tools do I need to crochet a star?

You’ll need about 6 yards of medium-weight yarn and a 5 mm hook. Also, have scissors and a yarn needle ready. You can use leftover yarn and adjust the hook size for different star sizes.

What types of yarn are best for crocheting a star?

Choose yarns that match the look you want. Medium and bulky yarns work well. Brittany from B.Hooked Crochet likes fluffy Homespun and super bulky Go For Faux yarn. She also made a star with Bernat Maker yarn and an 8mm hook.

How do I choose the right hook size for my crochet star?

The yarn label usually suggests a hook size. But, using a larger hook can make your star look better and reduce curling.

Are there video tutorials available for crocheting a star?

Yes, there are video tutorials. Brittany from B.Hooked Crochet has a detailed video for both right and left-handed crafters. It shows how to make a crochet star step by step.

What is the basic pattern for crocheting a star?

The pattern has two rounds. The first round is a ring of chain stitches, double crochets, and chain spaces. The second round builds the star points with chain stitches and different crochets, ending with a slip stitch.

How can I vary the size of my crochet star?

Change the yarn weight and hook size to vary the star size. Use bulkier yarn and a larger hook for a bigger star. For a smaller star, choose lighter yarn and a smaller hook. A larger hook size can also make the star flatter.

What are some tips for perfecting my crochet star?

Count your stitches carefully and adjust the hook and yarn as needed. Gauge and size checks are key for the right size. Try different materials to get the look you want.

How can I use my crochet stars creatively?

Crochet stars are versatile. Use them as festive decorations or ornaments. They can even be mounted in picture frames for handmade art.

What is the process for blocking and stiffening a crochet star?

Blocking refines the star’s shape. You can use finger adjustments or wet-blocking. To stiffen it, mix PVA glue with water or use spray starch. These methods are great for ornaments and hanging decorations.

Source Links

Crochet Bookmarks

Craft Lovely Crochet Bookmarks – Get Inspired Now!

Ever thought about why crochet bookmarks bring so much joy? In today’s digital world, there’s something special about holding a handmade bookmark in your hand. They add a touch of beauty to your favorite books. Whether you’re new to crochet or have been doing it for years, these bookmarks are easy and fun to make.

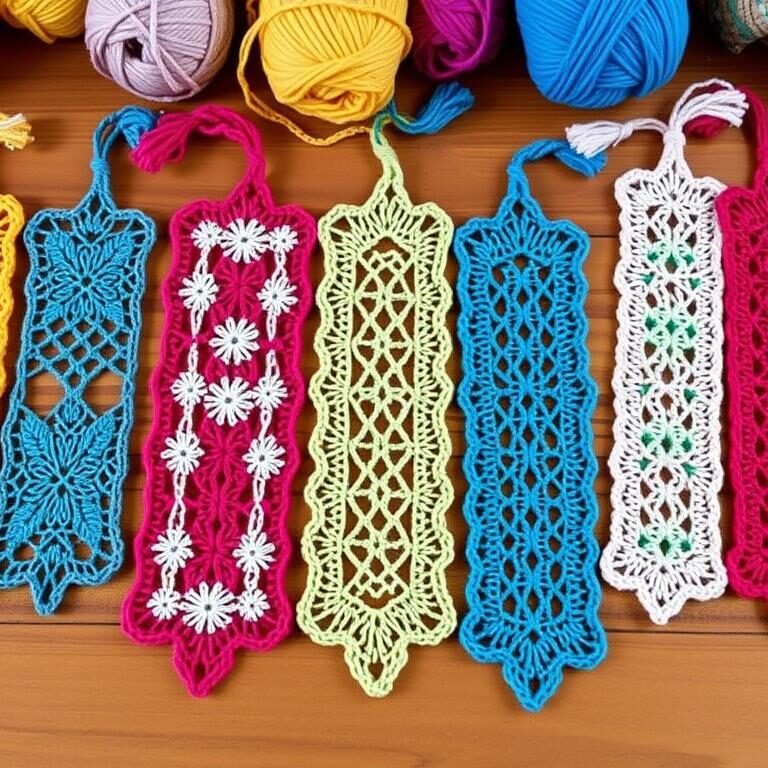
They come in many designs, from cute flowers to detailed lace. This variety can spark your creativity and inspire your next project.

Crochet Bookmarks are more than just decorations; they’re thoughtful gifts for book lovers and teachers. They’re a chance to try out new crochet skills and enjoy a calming activity. Explore this collection and see how handmade bookmarks can enhance your reading or make a meaningful gift.

Key Takeaways

  • Crochet Bookmarks cater to all skill levels, from beginner to advanced.
  • These projects provide a fun and creative way to practice new crochet stitches.
  • Handmade bookmarks make fantastic, personalized gifts for book enthusiasts.
  • Many of these bookmark patterns come with comprehensive video tutorials.
  • Bookmarks are a great addition to craft fairs and can be easily customized.

Why Handmade Crochet Bookmarks are the Perfect Gift

Handmade Bookmarks add a personal touch to reading, making them great choices for gifts. There’s joy in getting Crochet Gifts that show the maker’s skill and creativity. Crochet bookmarks are special because of their detailed patterns and care.

These bookmarks are perfect for holidays, Mother’s Day, or Teacher appreciation. They’re not just gifts; they’re also useful. With 37 distinct patterns, there’s something for everyone, from beginners to experts. There are 21 easy patterns for beginners to make something special.

Here’s a table showing the yarn weights and stitches used in different bookmark patterns:

Yarn Weight Patterns Stitches
Worsted C2C Crochet Corner Post stitches, Shell stitch
Embroidery Thread Filet Crochet Bookmark Fingering Yarn, Lace design
Sport Weight Suzette Bookmark Suzette stitch
DK Weight Ripples Crochet Bookmark Zigzag pattern, various colors
Super Fine Diadem Lace Crochet Flower Lace stitch
Crochet Thread Millie Lace Bookmark Lacy Pineapple design

Crochet projects like these are great for using up scrap yarn. They’re fun to make because they offer stress relief and quick results. From the Turin bookmark to the Bendable Book Worm, they bring happiness to both the maker and the receiver.

When you give Crochet Gifts like these, you show off your unique crafting ability. You share a part of yourself with the person reading. Whether it’s a delicate Elizabeth Bennet bookmark or a fun Men’s Moustache Crochet, these bookmarks are treasured gifts.

Getting Started with Crochet Bookmarks

Starting your crochet bookmark journey is exciting and useful. Making DIY Bookmarks from crochet patterns lets you add a personal touch to your reading accessories or create unique gifts. These bookmarks are not only made with little yarn but also quick to finish, fitting well into your busy schedule.

If you’re looking to dive into the delightful world of crochet, making bookmarks is a perfect starting point. Not only do these creative crochet ideas allow you to practice your skills, but they also provide an opportunity to design unique bookmarks that reflect your personality. With just a small amount of yarn and simple stitches, you can create beautiful, functional accessories that elevate your reading experience. Imagine a colorful bookmark peeking out from the pages of your favorite novel, adding a splash of creativity to your daily routine.

Getting started is easier than you might think. All you need are some basic supplies—yarn in the colors you love, a crochet hook, and a pair of scissors. Many people find it helpful to look up beginner patterns online or in crochet books, which can guide you through the basic stitches. Once you feel comfortable, let your imagination run wild! You can experiment with different yarn textures and patterns, transforming simple shapes into intricate and eye-catching designs. The possibilities are endless, from delicate florals to playful shapes that evoke a sense of whimsy.

What makes crochet bookmarks even more appealing is their potential for personalization. Whether you choose to make a bookmark for yourself or as a gift for a friend, you can customize each piece to suit the recipient’s tastes. Incorporating themes from their favorite books, favorite colors, or even their initials can make your crocheted creations feel truly special. Plus, they’re small and quick to whip up, making it easy to create a stack of unique bookmarks that shine in both their aesthetics and the love that goes into each stitch.

So why not grab some yarn and a hook today? Engage your creativity and embrace the joy of crafting as you embark on your crochet journey. You’ll soon find that these small projects can become not just practical items, but cherished tokens that celebrate the art of reading and the joy of handmade gifts. Happy crocheting!

Essential Materials and Tools

First, you need to get the right materials. Paton’s Grace by Yarnspirations is a great yarn choice, being light and made of 100% cotton. You’ll need about 30 yards for one bookmark. Use a 3.5 mm (E/4) crochet hook for the best results.

  • Yarn: Light weight yarn such as Paton’s Grace
  • Crochet Hook: 3.5 mm (E/4)
  • Other Tools: Scissors, tapestry needle

Also, have scissors and a tapestry needle ready for the final touches. With these tools, you can easily follow crochet tutorials to create beautiful DIY Bookmarks.

Basic Crochet Stitches You’ll Need

Knowing basic crochet stitches is key for making beautiful bookmarks. Here are the essential stitches you’ll find in most patterns:

  • Single Crochet (sc): Great for solid, dense fabric.
  • Double Crochet (dc): Creates a lighter, airy texture.
  • Slip Stitch (sl st): Often used to join stitches or create a smooth edge.

More complex designs might include stitches like the puff stitch or even Tunisian crochet. These skills will help you with simple bookmark patterns and prepare you for more complex projects.

The Suzette Bookmark pattern is elegant and simple. It uses an even number of chain stitches and requires 35 rows, ending with a tassel. It’s perfect for beginners and can be sold under certain guidelines. The size is about 2 x 7.5 inches, fitting books of all sizes, and uses American English crochet terms for easy instructions.

The popularity of crochet bookmarks is clear, with the Suzette Bookmark tutorial getting 72 shares on social media. This includes 44 shares on Pinterest and 28 on Facebook, showing the community’s love for DIY Bookmarks.

Easy Crochet Bookmarks for Beginners

Starting with simple crochet bookmarks is a great way to begin. These projects are easy and fun, perfect for beginners. Here are three easy and rewarding Crochet Bookmark Patterns for beginners.

Seedling Bookmark: A Quick Win

The Seedling Bookmark is simple and great for beginners. It’s a quick project that teaches basic crochet skills. You’ll need about 25 yards of yarn and a size F/5 (3.75 mm) hook.

This project can be finished in under 30 minutes. It’s perfect for beginners looking for a quick win.

Simply Elegant Bookmark: Classic and Simple

The Simply Elegant Bookmark is a classic design. It uses the double crochet stitch, making it easy to follow. It’s 2″ x 7″ and needs about 25 yards of worsted weight yarn.

It’s a great way to learn basic stitches. The pattern is straightforward, making it perfect for beginners.

Easy Lace Bookmark for Beginners

The Easy Lace Bookmark is perfect for those new to lace crochet. It comes with written instructions and a video guide. You can finish this beautiful bookmark in under an hour.

This pattern is designed for right-handed crocheters. It’s a great way to learn lace without getting overwhelmed.

These beginner-friendly patterns are great for making gifts or starting a new hobby. Happy crocheting!

Learning New Crochet Techniques through Bookmark Patterns

Trying new crochet techniques is a great way to grow your skills and make beautiful bookmarks. Each pattern brings its own challenges and rewards, making learning fun. Whether you’re just starting or have been crocheting for a while, these patterns offer something new to learn. Let’s explore some exciting bookmark patterns and techniques.

C2C Crochet Corner Bookmark

The C2C (corner-to-corner) Crochet Corner Bookmark introduces the corner-to-corner technique. This method lets you create detailed designs by starting at one corner and working diagonally. Using a single crochet stitch, it teaches you how to shape diagonals into designs. It’s perfect for adding a new skill to your crochet skills.

Crochet Bookmark Tutorial

Yarn Filet Crochet Bookmark

The Yarn Filet Crochet Bookmark is a fun way to try filet crochet. This style creates a lace-like look by making open and closed mesh spaces. With basic stitches like the double crochet and chain stitch, you can make bookmarks that are both sturdy and beautiful. A step-by-step Crochet Bookmark Tutorial can help you learn it.

Ripples Crochet Bookmark

The Ripples Crochet Bookmark focuses on creating a textured look with different stitches. It uses the half double crochet to make a wave-like effect. It’s great for those who love trying new things, as it requires keeping tension and rhythm consistent. With practice and a good Crochet Bookmark Video, you can make this stunning design.

Here are some stats and tips for these bookmark patterns:

Stitch Type Used in Patterns Recommended Yarn Estimated Time
Single Crochet Corner-to-Corner, Filet 100% Cotton 10-30 mins
Double Crochet Filet, Ripples Bamboo 1-2 hours
Half Double Crochet Ripples 100% Cotton 1-3 hours

By trying different patterns and techniques, you’ll find inspiration and improve your skills. So, grab your hook, pick a design, and start your next crochet project today!

Advanced and Stylish Crochet Bookmark Designs

Looking to improve your crochet skills? Advanced projects are perfect for showing off your skills. They let you create detailed and stylish bookmarks that show your love for crochet.

Millie Lace Bookmark

The Millie Lace Bookmark is great for those who know lace patterns. It’s elegant and sophisticated. It’s a great choice for a free Crochet Bookmark Pattern and guide.

Shabd Tunisian Mosaic Crochet Bookmark

The Shabd Tunisian Mosaic Crochet Bookmark is perfect for Tunisian crochet fans. It combines mosaic patterns with Tunisian crochet’s complexity. It’s a standout project with its colorful and textured finish.

Elizabeth Bennet Bookmark

The Elizabeth Bennet Bookmark is inspired by a classic character. It’s a mix of literary charm and crochet artistry. It’s a great example of a Crochet Bookmark Flower Free Pattern. Click here for more advanced patterns.

Working on these advanced patterns has improved my crochet skills. I’ve made beautiful bookmarks that I’ll treasure for years. It’s a rewarding journey, full of new stitches and techniques to learn.

Crochet Bookmarks: Patterns and Tutorials

Exploring crochet patterns free bookmark options is a fun journey for craft lovers. You’ll find simple designs and complex patterns for all skill levels.

Beginners should start with easy patterns. Try the Seedling Bookmark by Stitch By Fay or the Simply Elegant Bookmark by Sunflower Crochet. These take 10 to 30 minutes to make, using basic stitches.

For a challenge, try the Ripples Crochet Bookmark by My Crochet Space or the Millie Lace Bookmark by The Loophole Fox. These take a few hours but are worth it for their sophisticated look.

Crochet Patterns Free Bookmark

For advanced techniques, check out the Shabd Tunisian Mosaic Crochet Bookmark by Knitter Knotter or the Elizabeth Bennet Bookmark by This Pixie Creates. These use Tunisian Mosaic Crochet and spider stitch, offering a unique experience.

For fun bookmarks, try the Crochet Gnome Bookmark by Golden Lucy Crafts or the Bendable Book Worm Bookmark by Nicki’s Homemade Crafts. These add a playful touch to reading.

“Crochet bookmarks are a wonderful way to combine functionality with creativity. Whether you are gifting them or keeping them for yourself, each bookmark adds a personal touch to any book lover’s collection.”

Here’s a comparison of some notable patterns. It shows their estimated time, skill level, and unique features:

Pattern Estimated Time Skill Level Unique Feature
Seedling Bookmark 10-30 minutes Beginner Simplicity and quick completion
Ripples Crochet Bookmark A few hours Intermediate Complex stitch pattern
Shabd Tunisian Mosaic Bookmark 2-3 hours Advanced Tunisian Mosaic Crochet technique
Crochet Gnome Bookmark 1 hour Beginner Whimsical design

For a wealth of crochet book marks free pattern, check out online resources. Many designers also offer video tutorials to help you learn new techniques.

Fun and Whimsical Bookmark Designs

For those who love mixing fun with function, whimsical bookmarks are perfect. Crochet bookmarks free patterns offer endless fun. They make creating these delightful designs a joy.

Men’s Moustache Crochet Bookmark

The Men’s Moustache Crochet Bookmark adds a funny touch to your reading. It’s great for men who enjoy quirky accessories. This pattern is easy to make, perfect for beginners and experts alike. It’s sure to make you smile every time you open your book.

Crochet Gnome Bookmark

The Crochet Gnome Bookmark combines whimsy with amigurumi charm. It’s a cute and useful piece. As you work on it, you’ll love the detailed touches that make each gnome special.

Bendable Book Worm Bookmark

The Bendable Book Worm Bookmark is loved by all ages. It’s made with flexible materials that let it curl around pages. This project is fun and practical, making every read a joy.

Design Skill Level Materials Needed
Men’s Moustache Beginner 3-ply crochet cotton, crochet hook, scissors
Crochet Gnome Intermediate #1 superfine yarn, crochet hook, stuffing
Bendable Book Worm Beginner #3 light yarn, crochet hook, flexible wire

Tips for Perfecting Your Bookmark Craft

Making the perfect crochet bookmark is more than just a pattern. It’s about paying attention to details and knowing key techniques. I’ll share tips to make sure your bookmarks are beautiful, durable, and look professional. You’ll learn about choosing the right materials and mastering blocking techniques.

Choosing the Right Yarn and Thread

Choosing the right yarn and thread is key for a delicate finish. For bookmarks, use 100% mercerized cotton crochet thread size 3. It gives a polished look. You’ll need about 30-40 yards per bookmark.

Also, use a 1.25mm crochet hook for fine details. Think about the thread’s texture and strength to avoid wear and tear.

Blocking and Finishing Techniques

Blocking is vital to keep your bookmarks straight and prevent curling. Soak your finished piece, then pin it to a flat surface. Make sure it’s stretched to the right shape.

You can add Stay-flo liquid starch or Aileen’s Fabric Stiffener for extra firmness. Proper blocking keeps your project’s shape and gives a crisp finish. It makes your bookmarks look professional and ready for gifting.

For more detailed steps and patterns, check out the comprehensive guide online. Happy crafting and enjoy making your beautiful crochet bookmarks!

FAQ

What are some beginner-friendly crochet bookmark patterns?

Start with the Seedling Bookmark for beginners. It’s quick and easy. Try the Simply Elegant Bookmark for a single stitch pattern. The Easy Lace Bookmark is great for beginners wanting to try lace.

What materials do I need to start making crochet bookmarks?

You’ll need fine thread crochet, size 10 yarn or smaller, and a 1.65 mm crochet hook. Don’t forget scissors and a tapestry needle for finishing. These are key for making beautiful bookmarks.

How can I ensure my crochet bookmark doesn’t curl?

To stop curling, block your bookmark after finishing. Soak, pin, and let it dry. You can also use starch for extra firmness. This keeps your bookmark looking neat.

Where can I find free crochet bookmark patterns?

Look on Pinterest for free patterns. You’ll find simple flower bookmarks to intricate lace and fun designs like gnomes or strawberries. There’s something for everyone, no matter your skill level.

Are there advanced crochet bookmark patterns to challenge my skills?

Yes, try the Millie Lace Bookmark or the Shabd Tunisian Mosaic Crochet Bookmark. These use Tunisian crochet and other advanced stitches. They’re perfect for those who want to show off their skills.

What are some fun and whimsical crochet bookmark ideas?

Try making a Men’s Moustache Crochet Bookmark or a Crochet Gnome Bookmark. You can also make a Bendable Book Worm Bookmark. These patterns are fun and functional, great for adding a playful touch to your bookmarks.

What are some tips for selecting the right yarn for crochet bookmarks?

Use size 10 or finer yarn for a delicate look. Choose high-quality yarn for bookmarks that look great and last long.

How can crochet bookmarks be used as gifts?

Crochet bookmarks make wonderful gifts for book lovers and teachers. They’re personal and show you care. They’re perfect for special occasions or as a thank you.

What basic crochet stitches should I know for making bookmarks?

Learn the single crochet (sc) and double crochet (dc). Some patterns might use puff stitches or Tunisian crochet for more detail.

Can I find crochet bookmark tutorials with videos to help me learn?

Yes, many patterns and tutorials have videos. These videos help both new and experienced crocheters. They make learning fun and clear.

Source Links