Crochet Hacks

10 Clever Crochet Hacks to Boost Your Skills

As a dedicated crafter, I’ve always been amazed at how a single hook and a skein of yarn can create intricate beauty. Yet, as with any skill, there’s always room to grow. That’s why I’m thrilled to share my top crochet hacks—time-tested tips and tricks poised to elevate your crafting game to new heights. Whether you’re weaving a winter scarf or coaxing a blanket square by square into being, these crochet life hacks are essential for anyone looking to boost their crochet prowess.

Delving into these crochet skill boosters, it’s clear that genius sometimes lies in simplicity. Take the foundation single crochet (FSC) stitch, for example—an underappreciated starting point for projects that demand stability and elegance. Or consider the transformative power of techniques such as the magic circle, pivotal for projects that call for a flawless commencement. If you’re embarking on a journey into the intricate realms of crochet, these hacks aren’t just nifty—they’re necessary.

Key Takeaways

  • Foundation crochet such as the FSC stitch is a cornerstone for starting strong.
  • The magic circle requires patience but rewards with impeccable beginnings.
  • Essentials like the single crochet are simple yet pivotal for beginners to master.
  • Reverse single crochet, or Crab Stitch, adds polished edges to any piece.
  • Unlocking the potential of the HDC’s third loop can revolutionize textures.
  • Invisible joining methods like the Russian Join enhance project aesthetics.
  • Understanding color changes and weaving in ends ensures a meticulous finish.

Unlocking the Potential of Foundation Crochet

Foundation crochet is a game-changer for crocheters. It saves time, cuts down on yarn waste, and skips the hassle of traditional chaining. This change makes projects faster and the foundation more flexible and stretchy, perfect for snug fits.

The chainless foundation technique is simple and stable. It’s a shortcut that saves time and improves the fabric’s texture. Foundation single crochet (FSC) is especially good for a stable, stretchy base without the usual chain wobble.

Foundation stitches offer adjustable lengths and easy adjustments during projects. This is a big win for crochet efficiency. Adding these techniques to your skills makes your fabric’s foundation more adaptable.

Chainless Foundation Technique

The chainless foundation technique has changed my crochet game. It makes starts more consistent and flexible. You build stitches directly on the first row, combining two steps into one. It’s great for clean, sturdy starts without the bulk of traditional chains.

Foundation Single Crochet for Stability

Foundation single crochet (FSC) is top-notch for starting rows. It’s my favorite for designs needing a firm yet elastic edge, like hats and socks. This stitch gives a strong edge and a nice look, essential for quality crochet finishes.

Improving crochet techniques like the chainless foundation and FSC has made my projects better. These innovations and shortcuts help others start their crochet journey without the usual hurdles. They open up creative possibilities.

Using these foundation stitches in projects like afghans and sweaters makes the process easier. It boosts the project’s function and looks. This shows how valuable efficient crochet hacks are in everyday practice.

Mastering the Magic Circle for Flawless Projects

As I explore crochet, learning the Magic Circle has been a game-changer. It’s key for tight centers in Amigurumi, hats, and granny squares. At first, it seems tough, but it pays off with perfect results.

Using a 3.5mm Rose Gold Odyssey hook and #4 worsted weight Red Heart Super Saver yarn has been great. The yarn’s thickness makes each stitch clear, helping beginners grasp the Magic Circle.

  • Start with a 5-6″ tail for securing and weaving in ends later.
  • Light-colored yarns like off-white or light pink help beginners see each stitch.
  • Using a 3.5mm hook makes the learning process easier with its big loop.

A step-by-step video tutorial has been crucial for me. It shows the magic ring step by step, making it easier to learn. It’s perfect for those who learn better by watching.

Regular practice of the Magic Circle technique will not only enhance your skill but significantly speed up your project initiation time. It’s all about muscle memory.

For US notation users, abbreviations like sc (single crochet), inc (increase), and st (stitch) are common. They help keep everyone on the same page. Left-handed crafters can find special resources to help them too.

Learning the Magic Circle is worth it. It makes starting circular crochet projects easy and looks professional. Adding it to your skills will open up more project options. Take on this challenge and soon, you’ll do it with confidence.

The Art of Front and Back Loop Crochet

Exploring front and back loop crochet can make your crochet pieces better. It moves your skills from simple to complex. This skill is key for any serious crocheter, opening up new ways to texture and shape your work. Let’s see how these methods can boost your crochet skills and add to your collection of tips and tricks.

Creating Texture with Front Loop Crochet

Front loop crochet is great for adding raised lines and ridges. It’s perfect for making ribbed patterns or highlighting design elements. By using the front loop only, you create a subtle ridge. This is great for projects like hats or bags where you want a tactile feel.

Enhancing Stretch with Back Loop Crochet

Working with the back loop makes the fabric stretchy. This is perfect for clothes like sweaters and socks that need to stretch. The stretch is also good for edges and borders that need to fit well.

Technique Property Use-case
Both Loops Thick and Firm Amigurumi, maintaining shape
Front Loop Only Textured and Stretchy Ribbing patterns, clothing
Back Loop Only Fluid and Elastic Sweaters, socks with elasticity

Mastering front and back loop crochet opens up new possibilities. It makes your crochet projects more functional and creative. Whether you’re aiming for durability, texture, or stretch, knowing when to use these techniques will improve your work. Remember, the best way to get better at crochet is to keep trying and practicing. Use these tips to make your next project stand out!

Reverse Single Crochet: A Twist on Traditional Edges

As a crochet lover, I always look for new techniques. The reverse single crochet, or Crab Stitch, is a great find. It makes edges look good and saves time.

Crab Stitch Crochet Technique

This stitch works well with simple projects like sun hats and sweater necklines. It’s easy to do and adds a textured look. This is perfect for things like C2C graphgans.

There are many crochet edges to choose from. You can go for something delicate like the tulip blanket trim or something more bold like the camel stitch border. Each one has its own charm and purpose.

For a fancy touch, try a triple picot border or coronet lace trim. Or, if you’re new to crochet, the clusters and puffs dot border is a great choice. It’s easy and adds a lot of style to simple projects.

The reverse single crochet is a top pick for its mix of function and style. It’s easy to use, making it great for both new and experienced crocheters. It helps make edges look good and last long.

Using the reverse single crochet on a baby blanket or a spring towel adds a special touch. It makes your projects look professional and saves time. It’s a win-win for your crafting.

Discovering the 3rd Loop in Half-Double Crochet

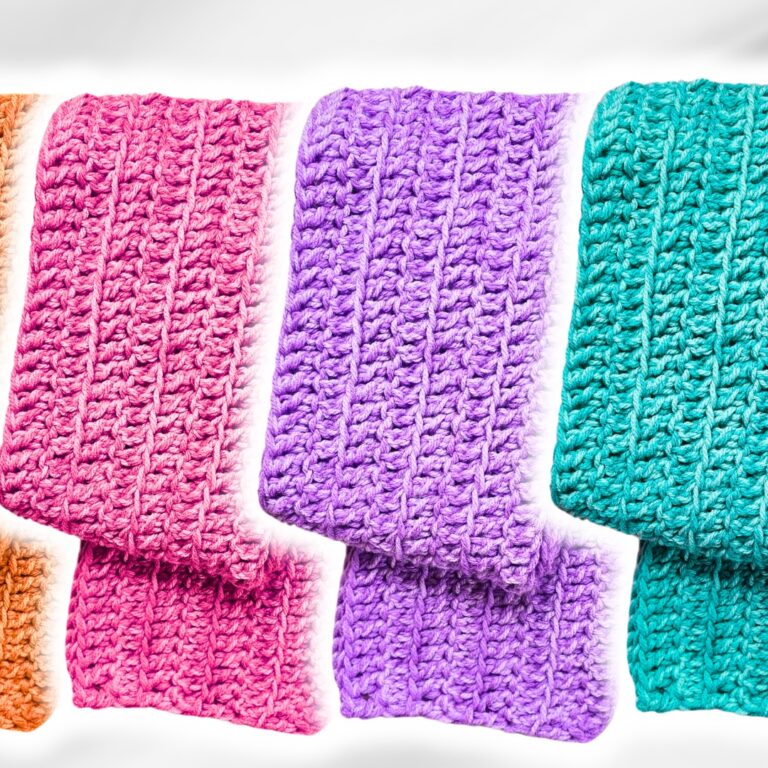
Exploring half-double crochet revealed crochet hacks that improve project texture and look. These hacks don’t need extra tools. They’re great for making items look like they’re knitted.

Half-double crochet has a secret: the third loop. This loop is hidden in simpler stitches like single crochet. It opens up new possibilities for crochet hacks, making it a key part of our craft.

Using the 3rd loop is simple. I use Red Heart Soft “Off-White” yarn with a 5mm Furls Rose Gold hook. This combo ensures smooth, even stitches. It’s perfect for showing off the stitch’s beauty. You can adjust the hook size to fit different projects, from tight amigurumi to loose garments.

Technique Details
Yarn & Hook Red Heart Soft “Off-White”, 5mm Furls Rose Gold hook
Starting Chains for Ribbing Start with 11 chains
HDC Stitches per Row 10 in each row for the ribbed band
Texture Technique Crocheting into the 3rd loop
Practice Tip Regular practice mastering the 3rd loop

The third loop in half double crochet changes the look of your work. It adds depth and structure. This method balances stability and decoration, perfect for edges or patterns in sweaters or beanies.

My journey into crochet efficiency hacks shows the importance of knowing each loop’s role. The back third loop is great for firm shapes. The front third loop is perfect for ribbed designs that look like they’re knitted.

This new way of crocheting encourages me to try new things. It lets me push the limits of what’s possible with just a hook and yarn.

I suggest trying this technique out. Start with a simple project like a hat or scarf. It’s a fun journey that makes our crafting more interesting, one stitch at a time!

Crochet Hacks: Invisible Yarn Joining Techniques

As a seasoned crocheter, I know how hard it can be to keep projects looking smooth. Invisible yarn joining techniques, like the Russian Join, are key. They make your projects look better and save you time.

The Russian Join hides yarn ends, making your work look flawless. It’s great for adding new yarn or changing colors. It gives your projects a strong and almost invisible finish.

Many crocheters struggle with visible seams, especially when finishing rounds. But, techniques like the Mock Invisible Join have changed that. They make projects look perfect, especially when you need a clean finish.

Crochet Timesavers

Using invisible joins makes your projects look better and saves time. Studies show they can save a lot of time compared to old methods. This makes them a must-have for crocheters who want to improve their craft.

But, not every project is right for every invisible join. Some projects need special techniques to look and feel right.

Perfecting the Russian Join

I encourage all crocheters to try these joining techniques. They can turn your projects into true works of art. Learning them is rewarding, improving both your projects and your time management.

Technique Project Suitability Visibility of Join Time Saved
Russian Join Multi-color projects Low High
Mock Invisible Join Continuous rounds like hats, cowls Very Low Medium
Traditional Knot Quick fixes, practice pieces High None

Learning about invisible joins shows why they’re so valuable. They’re key to making every crochet project beautiful. Let’s all work on making our crochet projects seamless and stunning.

Seamless Color Changes in the Round

For those who love crochet, learning seamless color changes is key. It makes projects like amigurumi look amazing. Discovering Crochet Colorwork was a game-changer for me.

Amigurumi needs smooth color changes, especially in details like arms and legs. The Invisible Crochet Color Change makes these transitions almost invisible. It also keeps the toy stable and delicate.

Avoiding Jogs in Striped Patterns

Getting rid of jogs in striped patterns is a big challenge. I found that the Invisible Color Change technique helps a lot. It involves hooking into the back loop of the first stitch with the new color. This makes the color change seamless, which is vital for perfect crochet work.

Technique Benefits Recommended Yarn
Invisible Crochet Color Change Smooth, undetectable color transitions We Crochet / Knit Picks Brava Worsted
Invisible Join Enhanced aesthetics, prevents head wobble in amigurumi We Crochet / Knit Picks Brava Worsted
Standing Single Crochet Stitch Seamless start for new color We Crochet / Knit Picks Brava Worsted

Thanks to Crochet Tips and Tricks videos, I’ve mastered seamless color changes. I’ve shared these skills with others who appreciate fine craftsmanship. These tips help keep the crochet piece looking great without losing its shape.

Using these techniques has made a big difference in my crochet work. People on social media love the results. It shows that the beauty of crochet is in both the making and the finished product.

Efficient Ways to Weave in Your Ends

Even the most beautifully crocheted item can lose its charm if the ends aren’t secured properly. It’s a task we can’t afford to ignore—statistics show that a well-finished project has significantly higher quality. It’s about more than just the aesthetic appeal; it’s ensuring longevity and functionality. After nearly a decade of waving my crochet hooks, I’ve come to appreciate the magic that efficient end-weaving techniques contribute to my work. It’s a Crochet Efficiency Hack that has transformed my crafting game.

Weave As You Go

When it comes to Crochet Shortcuts, ‘Weave As You Go’ is a game-changer. This technique allows you to weave in loose ends concurrently with your crochet work, integrating and locking the yarn tails into your piece as you go. It not only saves time but also secures the yarn ends more effectively than crocheting over them—a method which, despite its prevalence, tends to result in ends unraveling over time. I’ve learned, by lacing my ends along the stitches, it minimizes the risks of ends popping out after a wash or with wear. And, if you’re wondering about the tools for the task, I’ve seen firsthand the advantages of selecting the right yarn needle; a metal needle, for instance, glides smoothly and helps maintain the perfect tension.

Securing Tails for a Neat Finish

I’ve learned the effectiveness of waiting to weave in ends until after seaming; it helps to avoid unnecessary bulkiness and ensures the project lays just right. To counter the challenge of short tails, always allow yourself a generous length of yarn to work with—it’s better to trim after securely weaving than to struggle with insufficient ends. Remember, weaving in each end with a yarn needle at least three times in opposing directions anchors it firmly. Although it may seem like a labor-intensive step, investing time in this crucial finishing stage pays off immensely. A piece crafted by hand deserves this care. To understand this more comprehensively, you can dive into detailed techniques on maintaining the integrity and beauty of your.

FAQ

What are crochet hacks and why should I use them?

Crochet hacks are clever tricks that make crocheting easier. They simplify steps, improve your projects’ finish, and save time. Using these hacks, you’ll find crocheting more fun and efficient.

How does the chainless foundation technique improve my crochet projects?

The chainless foundation technique makes starting your crochet work better. It avoids the tightness and unevenness of traditional chains. This method leads to even starting rows and a consistent fabric.

What is the magic circle and how will mastering it benefit my crochet?

The magic circle is a way to start crochet projects in the round without a hole. It’s key for items like hats and amigurumi. Mastering it makes your circular projects look professional.

Can altering the loops I crochet into really change the fabric’s properties?

Yes! Crocheting into front or back loops changes the fabric’s texture and stretch. Front loop crochet makes the fabric firmer. Back loop adds stretch, making your projects more versatile.

What is reverse single crochet and how does it benefit my edging?

Reverse single crochet, or Crab Stitch, works single crochet stitches in reverse. It creates a strong, corded edge. This technique adds a decorative and professional touch to your projects.

How does using the third loop in half-double crochet enhance my work?

Using the third loop in half-double crochet gives your fabric a knit-like look. It adds texture without extra tools or techniques. It’s a simple way to make your projects more interesting.

Why is the Russian Join considered a supreme crochet life hack for yarn joining?

The Russian Join is great for joining yarns without knots or bulk. It weaves the yarn ends together, making your fabric smooth and strong.

How do I avoid jogs in my striped patterns when crocheting in the round?

To avoid jogs, start the new yarn with a slip stitch at the end of the round. This ensures a smooth transition between stripes, important for patterns that need continuity.

What is the ‘Weave As You Go’ method for weaving in ends?

‘Weave As You Go’ involves weaving in yarn ends as you crochet. It secures the ends within the fabric, saving time and ensuring a clean finish.

How can I make sure my tails are secured neatly for a durable finish?

To secure your tails, weave them in by sewing through back loops or alongside your stitches. Then, reverse and stitch back in the opposite direction. This method locks the tails in, preventing unraveling.

Source Links

Avoiding Crochet Mistakes

Common Crochet Mistakes and How to Avoid Them

As someone who’s journeyed through the loops and knots of crochet, I’ve seen how each stitch can add to the narrative of our creations. But what happens when unintended crochet mistakes start rewriting that story? It’s a common misconception that only novices face crochet blunders. In truth, from my own oops moments to the collective experiences of many crafters, we’re all susceptible to the occasional crochet mishap, regardless of our skill level.

I’ve learned that those oops moments—whether they be accidental stitches, gauge inconsistencies, or just the wrong shade of yarn—can become treasured parts of our crochet journey, especially when we know the crochet troubleshooting steps to take. Even something as seemingly minor as choosing a slightly different hook size or yarn weight can spin your project’s story in a whole new direction, which is why knowing the nuances of crochet fixing is so crucial.

So let’s unravel these knots together. I’ll share the wisdom I’ve gathered from my time with the hook, from understanding the true importance of a gauge swatch to recognizing the pitfalls of not reading through your crochet pattern thoroughly before beginning. My aim is to guide you through the maze of common crochet repair techniques, helping you hold onto the joy of the craft without the frustration of unexpected turns.

Let’s dive into the stitches and explore how to bring precision, joy, and a sense of accomplishment to every piece we create, ensuring that the story your project tells is exactly the one you intended.

Key Takeaways

  • Understanding the significance of stitch definition, and why I stand by 100% cotton yarn for 80% of my projects.
  • Learning the importance of using online reviews and recommendations to choose the best yarn for quality and drape.
  • Start your projects right: Why I always reach for a larger hook on that foundational chain.
  • The vital habit of weaving in ends with at least 5-6 inches of yarn to ward off those fraying nightmares.
  • Mastering basic crochet stitches as pivotal stepping stones for tackling most patterns.
  • Embracing the learning curve—how my past flops have shaped my current expertise.
  • Why patience and consistent practice are your best allies in becoming a crochet virtuoso.

Understanding Basic Stitch Techniques

Improving your crochet skills starts with mastering basic stitches. Knowing how to do stitches right can make your projects better. Many beginners face problems early on, but with practice, you can avoid these issues.

Mastering Both Loop Crocheting

One common mistake is not using both loops of a stitch. This can make your seams weak. Start with a chain of 22 stitches to practice. It helps you learn the right way to crochet and makes your fabric stronger.

Recognizing the Importance of Gauge Swatches

Not making gauge swatches is a big mistake. They help you check if your crochet is the right size. Without them, your projects might not fit right or look uneven. If you’re unsure, look at tutorials here for help.

Common Issue Frequency Impact on Project
Crocheting only in the front loop High among beginners Weak seams, less structured products
Skipping gauge swatch Common Incorrect project size and fit

Mastering crochet means fixing mistakes from the start. Practice basic stitches and gauge swatches to improve. Every stitch you make brings you closer to being a better crocheter.

Managing Project Consistency

Understanding how to keep your crochet projects consistent is key. Often, mistakes come from small errors like wrong stitch or row counting. These mistakes can cause a lot of frustration and need a lot of fixing.

Counting Stitches to Maintain Shape

To stop projects from getting bigger or smaller, you need to count stitches right. This keeps each row the same, stopping your project from changing size. I find using stitch markers or a simple count on paper really helps in fixing mistakes.

Here are some tips for better stitch counting:

  • Use brightly colored stitch markers to mark the start or end of patterns.
  • A digital row counter is great for big projects.
  • Always check your work against the pattern, especially after tricky parts.

Counting Rows for Even Progression

Counting rows is just as important. If you count wrong, your project might be too long or too short. This can mess up the shape and look of your work. Counting rows carefully can save you from having to rip out hours of work.

Here’s how to keep track of your rows:

  • Make a small mark on paper or use a row counting app each time you finish a row.
  • Use a different color of yarn every 5th or 10th row to help you see where you are.
  • Check your row count at the end of each session to make sure it’s right.

In summary, to fix mistakes or improve your crochet, focus on counting stitches and rows carefully. This keeps your projects the right size and shape. It also makes your crochet work better and more enjoyable.

Interpreting Crochet Patterns Accurately

Learning to read crochet patterns well is key to avoiding mistakes. At first, I didn’t know how much yarn I needed or the right stitch size. This led to errors. To fix this, I started by carefully reading the pattern before starting to crochet.

One mistake I made was not knowing that a turning chain counts as a stitch. I also didn’t adjust the chain length for different stitch heights. Here’s a simple guide to help you understand basic crochet pattern instructions and abbreviations:

Abbreviation Meaning
Ch Chain
Sl st Slip Stitch
Sc Single Crochet
Hdc Half Double Crochet
Dc Double Crochet
Tr Triple or Treble Crochet
Inc Increase
Dec Decrease
Turn To Turn Your Work
Join To Join Two Stitches Together
Rep To Repeat a Step

Symbols like asterisks (*), brackets [ ], and parentheses () are also important. An asterisk means to repeat steps in a row. Brackets show how many times to do a step. Parentheses group stitches to be worked together. Knowing these symbols helps keep your pattern correct and your project looking good.

It’s also important to watch your stitch counts and gauges. I always count my stitches every few rows, especially if I’m new to crochet. This keeps my project consistent with the pattern. And if you’re unsure about a step, it’s best to ask for help to make sure your crochet project looks great.

Choosing the Right Materials

When you start crocheting, picking the right materials is key. It helps you fix crochet mistakes, avoid common errors, and make your project look great. Knowing how to pick the best yarn and hooks is essential.

Yarn Weight: Ensuring Pattern Conformity

Choosing the right yarn weight is crucial for your project’s look and feel. Yarns vary in weight, which affects their thickness. Beginners often find worsted weight yarn, labeled as #4, the easiest to work with.

It’s perfect for learning stitches and creating beautiful patterns. However, lighter or thicker yarns can be harder to handle for beginners. They need different techniques and adjustments in tension.

The table below shows different yarn weights and their uses:

Yarn Weight Number Description Common Uses
1 – 3 Thin yarns (light to DK) Delicate projects like doilies or fine garments
4 Worsted (Medium weight) Most accessories, sweaters, and home décor items
5 – 7 Bulky to super bulky Thick blankets, scarves, and winter gear

Selecting the Correct Hook Size

Choosing the right hook size is also important. Using the wrong hook can lead to tight or loose stitches. Hooks vary from small for lace to large for chunky yarns.

Beginners often start with a 5mm hook for worsted weight yarn. This size is easy to handle and helps keep stitches even.

Choosing the right materials is not just about looks. It also affects your project’s durability. Try a swatch to see how yarn works with different hooks. This helps avoid mistakes.

Distinguishing Between US and UK Crochet Terms

As a devoted crocheter, knowing the difference between US and UK crochet terms is key. It helps avoid common mistakes and improves your repair skills. This knowledge is especially helpful when working with patterns from different places.

Journey through Understanding Crochet Terms: Knowing whether a pattern uses US or UK terms is crucial. The same terms can mean different stitches in each system. This can lead to confusion and mistakes.

For example, ‘single crochet’ in the US is ‘double crochet’ in the UK. The US ‘double crochet’ is ‘treble’ in the UK. This affects the stitch type, size, and look of your project.

It’s important to look for clues like “color” or “colour” and yarn weight descriptions. Also, check if measurements are in centimeters or inches.

Statistical Insights Percentage
Percentage of crocheters confused by US/UK term differences 65%
Patterns specifying American or British terms on Craftsy 75%
Craftsy designers offering multiple terminology versions 30%
Crocheters who find terminology charts useful 85%

The data shows how important clear pattern writing is. Reference tools like conversion charts are crucial for 85% of crafters. They help when working on Craftsy or with designs from different countries.

Always check for key terms and notation differences in patterns. Learning these differences helps avoid mistakes. It also makes you a better crocheter, ensuring your projects are precise and skilled.

Crochet Mistakes

Mistakes happen in crochet, whether you’re new or experienced. Knowing how to fix common errors is key. This part will show you how to handle crochet troubleshooting for basic skills and keeping your projects in shape.

Correcting Foundation Chain Errors

The foundation chain often trips up beginners. A small mistake here can mess up your whole project. Start by carefully counting your chains. If you make a mistake, it’s better to start over than to fix it later.

Being too tight or loose in the starting chain can cause problems. It affects how easy it is to work into the chain and can make edges uneven. Getting the tension right here is important for the rest of your project.

Preventing Shape Distortion in Projects

To avoid shape problems, pay close attention to stitch counts. Each row should have the exact number of stitches. If you make a mistake, it can make your project grow or shrink. Use stitch markers to keep track of your stitches and catch errors early.

Also, make sure your turning chains are the right size. They should match the rest of your stitches perfectly. This is important for the shape and edge of your project.

Crochet Fixing

To improve your crochet troubleshooting, always make a gauge swatch. It helps you see if your hook size and yarn weight are right for your project. This way, you can make changes early on.

It’s also important to know the difference between U.S. and U.K. crochet terms. Using the wrong terms can mess up your project. This is a common mistake that can stop your project in its tracks.

With these tips, you’ll get better at fixing mistakes and making beautiful crochet pieces. Every stitch is important, and the joy of crochet comes from the skill and patience you put into it.

Perfecting Crochet Finishing Techniques

The final steps of a crochet project are just as important as the start. Finishing your crochet right makes it look better and last longer. We’ll cover key techniques like weaving in ends and the magic loop to help you avoid common mistakes.

Weaving End Tips for a Clean Finish

Securing yarn ends is a big challenge in crochet. A good way to keep them from coming undone is to weave them back through your stitches. Use a yarn needle for about three to four inches. This method keeps your work neat and prevents loose ends.

For those who love visuals, check out this guide on crochet repair for more details.

Understanding the Magic Loop and Starting Chains

Starting your crochet project right is key. The magic loop method is cleaner and more flexible than traditional methods. It’s great for projects like hats and amigurumi because it prevents holes and lets you adjust sizes.

Using a slightly bigger hook for the foundation chain helps too. It stops the starting chain from getting too tight. This is important to avoid a tight base in your projects.

As you get better at crochet, remember that fixing mistakes is just as important as making them. Improving your finishing techniques makes your projects look and feel better. Keep practicing to make your crochet work look professional.

Learning to ‘See’ Your Stitches and Count Correctly

Many beginners struggle with stitch counts, which can mess up their crochet projects. It’s key to learn how to count and see each stitch correctly. This helps avoid common mistakes.

Counting stitches is a vital skill in crochet. It ensures your work turns out right. Self-taught crocheters often make mistakes because they don’t focus on counting stitches. To avoid these errors, it’s important to learn how to count stitches properly from the start.

  • Chainless Starting Stitches can prevent miscounts and maintain straight edges.
  • Implement stitch markers at the end of rounds to manage your stitch count effectively.

Following a pattern with clear stitch count instructions helps avoid mistakes. This way, you’re less likely to add or skip stitches.

Crochet Mishaps and Proper Count

Common Issue Main Cause Preventive Tips
Adding Stitches Failure to identify each stitch correctly Regularly count stitches, use markers
Skipping Stitches Misplacing the first stitch of a row Ensure foundational chains are precise
Uneven Edges Not counting the turning chain as a stitch Clarify pattern instructions regarding chains

Many beginners are unsure if the turning chain should be counted as a stitch. The answer depends on the pattern. Knowing this can prevent mistakes that lead to gaps in your work.

To avoid mistakes, make stitch counts a habit. This way, you can ensure accuracy and avoid redoing large parts of your work. It makes your crochet journey smoother and more enjoyable.

Conclusion

We’ve looked at common mistakes in crocheting, especially for beginners. The secret to avoiding these errors is to keep practicing and stay committed. Remember, fixing crochet mistakes is a journey, not just a goal.

Every stitch and yarn over is a chance to learn and improve. Choosing the right hook and yarn, and keeping tension even, are key. These steps help you avoid the need for crochet repair.

Even with careful planning, we all face crochet flaws. Maybe your granny squares aren’t perfect, or your scarves grow unexpectedly. These issues teach us to pay attention to detail and understand crochet better.

For those struggling with gauge or unclear patterns, don’t worry. Every finished project brings you closer to your crochet goals. It’s a journey of learning and growth.

To all crocheters out there, keep a stash of supplies and study your patterns well. Each time you fix a mistake, you show your dedication and skill. So, keep crocheting and remember, every stitch is important.

When people admire your work, it makes all the effort worth it. Keep creating, and your hands will make even more beautiful things.

FAQ

What are some common crochet mistakes and how can I avoid them?

Common mistakes include crocheting only in the front loop and not making gauge swatches. Also, not accurately counting stitches and rows can cause shape distortion. To avoid these, crochet under both loops unless told otherwise. Practice making gauge swatches to ensure the right tension. Count stitches and rows carefully to keep your project consistent.

Why is mastering both loop crocheting important?

Crocheting through both loops makes your fabric stronger and more stable. It also keeps your work from stretching out of shape. This technique is key for the durability and look of your crochet pieces.

How do gauge swatches affect my crochet projects?

Gauge swatches help you check if you’re working at the right tension. This is crucial for the size and fit of your project. Always make a gauge swatch at the start of a new project, especially when using a different yarn.

Why is counting stitches and rows important in crochet?

Counting stitches and rows keeps your project the right size and shape. If you get this wrong, your work might grow or shrink, which can be frustrating. It helps keep your crochet even and symmetrical.

How can I ensure my crochet project progresses evenly?

To keep your project even, count rows and use markers or a notepad. Pay attention to pattern instructions on turning chains and stitch placements. This helps keep your work even and well-shaped.

How can I avoid crochet mishaps when interpreting patterns?

Read the pattern carefully before starting. Get to know any new stitches or techniques. Look for special instructions, like how to count the turning chain. Also, understand the pattern’s stitch count and shape to avoid mistakes.

How does yarn weight affect the outcome of my crochet pattern?

Yarn weight changes the gauge, size, and drape of your project. If you use a different yarn without adjusting, your project will change a lot. Always make a gauge swatch when changing yarns to match the pattern.

Why is selecting the correct hook size crucial for my crochet project?

The right hook size gives your stitches the correct tension and size. Using the wrong hook can make your project not fit right. Use the hook size recommended or find the right one with a gauge swatch.

How do I distinguish between US and UK crochet terms?

US and UK crochet terms are different. For example, a single crochet in the US is a double crochet in the UK. Always check the pattern to know which terms to use to avoid mistakes.

How can I correct foundation chain errors?

To fix foundation chain errors, count your chains carefully before starting. Make sure you’re not missing or adding any. If your chain is too tight or loose, adjust your hook size or tension.

What should I do to prevent shape distortion in my crochet projects?

To avoid shape distortion, place the first stitch correctly in each row. Always count your stitches in every row. Use stitch markers to keep your work straight and consistent.

How should I weave in ends for a clean finish?

Weave in your ends by threading the tail back and forth through stitches on the wrong side. Make sure to go in several directions to prevent unraveling. You can tie a small knot before weaving in for extra security.

Why is understanding the magic loop and starting chains important?

The magic loop technique helps with a tighter start when working in the round. This is key for amigurumi and hats. Mastering starting chains is important because they set the foundation of your project. Too tight chains can warp it, while too loose can make it sloppy.

How can I learn to ‘see’ my stitches and count them accurately?

Learning to ‘see’ your stitches takes practice. Get familiar with how each stitch looks and where to insert your hook. Counting accurately means paying attention to the top of stitches and the turning chain. Use tally marks or markers to track your stitch count.

Source Links