How to Crochet a Star

Craft a Star with Ease: How to Crochet a Star

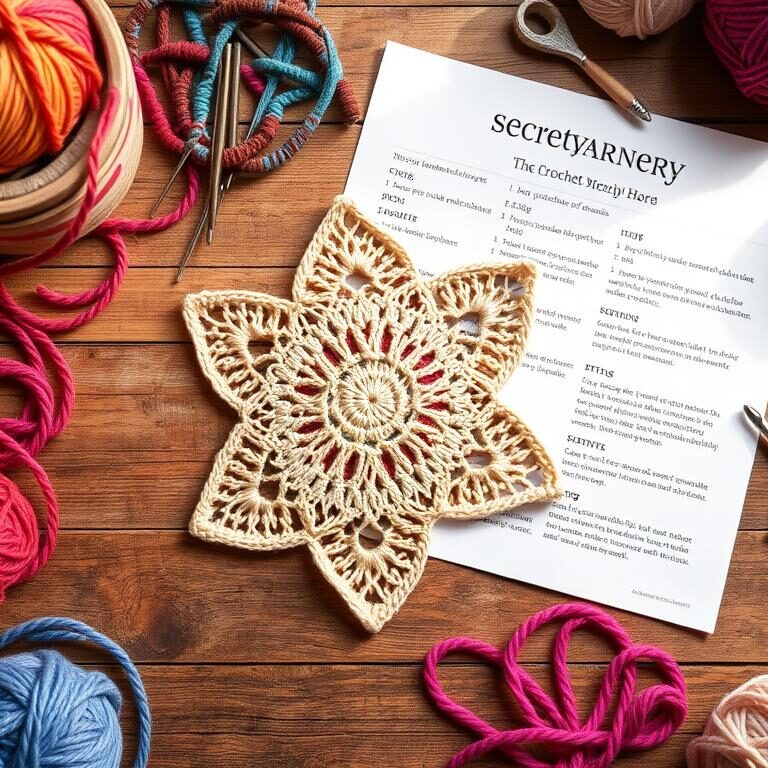
Ever thought about making a star from yarn with just a few stitches? You’re in the right spot! This guide will show you how to crochet a star easily. It’s great for holiday decorations or personal crafts. Let’s explore the fun of making your own DIY crochet star!

Brittany from B.Hooked Crochet has a beginner-friendly pattern for us. It’s fun for both newbies and seasoned crocheters. You can use medium-weight yarn for a 4-inch star or try different yarns and hooks for unique sizes.

Are you ready to add a touch of whimsy to your crafting repertoire? If so, you’re in for a treat! In this guide, we’ll explore how to crochet a star with ease, a delightful project that brings joy to crocheters of all skill levels. Whether you’re a complete beginner or a seasoned pro looking to try something new, this Crochet Star DIY guide will walk you through creating beautiful, star-shaped designs that can be used for decorations, gifts, or even as charming embellishments for other projects. 

With just a few basic stitches and some medium-weight yarn, you can whip up a 4-inch star in no time, or mix it up by experimenting with different yarns and hooks for unique sizes and textures. Let’s dive into the enchanting world of crochet and discover the magic of crafting your very own Crochet Star Pattern!

Key Takeaways

  • The crochet star pattern takes approximately 10 minutes to complete.
  • The finished size is 4 inches wide using medium-weight yarn and a 5.0mm hook.
  • The pattern is adjustable for different sizes by varying yarn weights and hook sizes.
  • Standard US crochet terminology is used, including Ch (Chain) and Dc (Double Crochet).
  • A handy video tutorial is available on YouTube for visual learners.

Introduction to Crocheting a Star

Learning to crochet a star is a fun and rewarding journey. A Step-by-Step Crochet Star guide makes it easy for beginners. It breaks down the process into simple steps, perfect for a Beginner Crochet Star Tutorial.

The star stitch is a key part of our project. It starts with 22 stitches. Each row has a beginning, star stitches, and an end, making it easy to follow.

Making crochet stars is a fun and affordable hobby. It uses leftover yarn and tools, keeping costs low. These stars can add beauty to many items, like holiday decorations and baby blankets.

The pattern works for both right and left-handed crocheters. It’s important to remember that turning chains don’t count as stitches. This ensures your star turns out right every time. With just 11 steps, this tutorial helps beginners make beautiful stars.

Materials and Tools Needed for a Crochet Star

Starting a crochet star project is easy with the right crochet star materials. Here’s a quick list of what you need for this fun project:

  • Yarn: I suggest Flax & Twine Daytime Linen in Fingering Weight in Stone. You can also buy kits in different yarn sizes. Some good yarns include:
    • Style Craft Bambino DK in Clotted Cream – finished size: 3 inch X 3 inch (using a 4mm hook)
    • James C Brett Twinkle DK in Gold – finished size: 3 inch X 3 inch (using a 4mm hook)
    • Rico Fashion Cotton DK Metallise DK in White Gold (002) – finished size: 3.5 inches X 3.5 inches (using a 4mm hook)
    • Paintbox Simply Super Chunky in Champagne White – finished size: 7 inches X 7 inches (using a 9mm hook)
    • Paintbox Simply Super Chunky in Champagne White & Hobbii Umami Scarlet (17) – finished size: 6 inches X 6 inches (using a 9mm hook)
  • Crochet Hook: You’ll need a 2.35mm crochet hook, but kits might have different sizes. Here are some options:
    • 4mm hook for medium projects
    • 6.5mm hook for larger, more pronounced stars
    • 9mm hook for extra large stars
  • Tools: Make sure you have scissors and a yarn needle too.

Having all these crochet star materials ready will help you follow the crochet star DIY guide. Let’s look at how different yarns and hooks change the result:

Yarn Type Hook Size Finished Size
Style Craft Bambino DK in Clotted Cream 4mm 3 inch X 3 inch
James C Brett Twinkle DK in Gold 4mm 3 inch X 3 inch
Paintbox Simply Super Chunky in Champagne White 9mm 7 inch X 7 inch
Paintbox Simply Super Chunky & Hobbii Umami Scarlet (17) 9mm 6 inch X 6 inch

Get your crochet star materials and start with the crochet star DIY guide. You’ll make beautiful, versatile crochet stars for your next project!

Choosing the Right Yarn and Hook

Choosing the right yarn and hook is key when making your Crochet Star Pattern. The yarn’s texture and weight greatly affect your star’s look. I love trying out different yarns to see their unique effects.

Types of Yarn

Medium-weight yarn is best for a perfect crochet star. It’s easy to work with and looks great when finished. Brittany likes using Bernat Maker yarn with an 8mm hook for a sturdy star.

You can also try different yarn textures like fluffy Homespun or super bulky Go For Faux. They offer flexibility for various styles.

Feel free to play with different textures and colors for unique stars. When choosing yarn for crochet star patterns, mixing yarn weights like DK, Bulky, and Worsted can create stunning combinations.

Hook Sizes

The right hook size goes with your yarn. Using a hook size larger than recommended can prevent curling and improve your star’s look. For example, an 8mm hook with Bernat Maker yarn makes a star with perfect structure.

Always check the yarn’s ball band for recommended hook sizes. This ensures compatibility and the best results for your Crochet Star Pattern.

In conclusion, the right yarn and hook size make your crochet process easier and your star more appealing. With practice and experimentation, you’ll find the perfect match for your projects.

How to Crochet a Star: Step-by-Step Tutorial

Making a crochet star is fun and easy with our guide. It has two main rounds, making it quick and simple for everyone. Follow this step-by-step guide to make your star.

First, get your supplies ready: size 5 bulky yarn, a size K (6.50 mm) crochet hook, and more. You’ll need a yarn needle, scissors, fabric stiffener, jute cord, cardboard, plastic wrap, and rust-proof pins. These are key for a perfect star.

The pattern uses American crochet terms. You’ll learn basic stitches like the chain (ch), double crochet (dc), and more. Start with a magic loop, chain 3, and then do 9 double crochets. This makes the base of your star.

In Round 2, the magic unfolds. Chain 1 and single crochet in the same spot. Then, use double crochet, treble crochet, and chains to make 5 star points.

The Crochet Star Video Tutorial is a great help. It shows each step for both right and left-handed crafters. Watching it with the written guide helps both visual and auditory learners.

After crocheting, block your star. Mix fabric stiffener with water, then shape your star on a mat or cardboard. Secure it with pins and let it dry for hours.

Finishing a crochet star is very rewarding. Try different yarn colors and sizes to make beautiful stars. They’re great for decoration.

Simple Crochet Star Pattern Instructions

The Easy Crochet Star Pattern is perfect for both new and experienced crafters. It has only two rounds, making it great for beginners. Here’s a simple guide to help you start.

Round 1: Making the First Loop

Start by making a ring with chain stitches. This ring is the base of your star:

  1. Begin with a slip knot and chain 4.
  2. Join with a slip stitch (sl st) to form a ring.
  3. Chain 3 (this counts as your first double crochet).
  4. Work 15 double crochets (dc) into the ring.
  5. Join with a slip stitch to the top of the beginning chain 3.

Round 2: Forming the Star Points

In Round 2, you’ll make the star’s points:

  1. Chain 5 (this counts as the first treble crochet and chain 1 space).
  2. In the same stitch: Work 2 treble crochets (tr), 1 double crochet (dc), 1 half-double crochet (hdc), and 1 single crochet (sc).
  3. Skip the next stitch, and in the following stitch, repeat the sequence of 1 sc, 1 hdc, 1 dc, 2 tr, and chain 1.
  4. Repeat step 3 around to form all 5 points.
  5. Join with a slip stitch to the first chain 5 space.

Once you’ve finished, weave in the ends for a neat look. This pattern is easy and beautiful. You can change the yarn and hook size to make it your own. Try blocking the star to make it look even sharper.

Tips for Perfecting Your Crochet Star

To get your crochet star just right, remember a few key tips. First, carefully count your stitches in each round. This keeps your pattern tight and your star symmetrical.

Playing with hook sizes and yarn weights is also important. Changing these can make your star bigger or smaller, without altering the pattern. A smaller hook and thinner yarn make a delicate star. A larger hook and thicker yarn make it more substantial.

Don’t overlook the importance of gauge and finished size checks. Even though gauge isn’t always necessary, it can affect your star’s look and size. A quick gauge check before starting can save you time and ensure your star turns out as you hoped.

Crocheting Tips

For detailed steps on making a perfect crochet star and more tips, see this comprehensive tutorial.

Aspect Tips for Perfection
Stitch Counting Consistently count your stitches in each round to maintain symmetry.
Hook & Yarn Adjustments Experiment with different hook sizes and yarn weights to achieve the desired star size.
Gauge Checks Even if not mandatory, gauging ensures the final product meets your expectations.

Enjoy the journey and feel free to experiment with different techniques. Whether for holidays or a mobile, each star can be a unique piece of art.

Remember, crochet stars are versatile. They can be ornaments, appliques, or garlands, among other things. Happy crocheting!

Different Uses for Crochet Stars

Crochet stars are very versatile. They can add a personal touch to your home, festive settings, or craft projects. You can make small or large stars, depending on your project.

Decorative Ideas

Decorative crochet stars are great for many decor projects. They can be turned into festive garlands, wreaths, or even coasters:

  • Crochet star garlands: Use lightweight yarn to make garlands with big and small stars. You can turn them into ornaments by adding a chain loop.
  • Star wreaths: They’re perfect for patriotic displays. You can add flags to the stars for a festive look.
  • Star coasters: These coasters are trendy and functional. They have six sections and take two rounds to make.

Craft Projects

Crochet stars are not just for decoration. They can also be used to make unique gifts or household items. Here are some examples:

Project Description
Bernat Crochet Star Baby Blanket It’s great for beginners because of its easy rounds.
Crochet Starshine Blanket This blanket is challenging but rewarding. It’s part of the Hugs & Kisses Series.
Crochet Stars and Stripes Forever Wreath This wreath has 4 sets of 3 stars and 4 American flags. It’s perfect for patriotic displays.
Crochet Star Throw This throw uses diamond shapes. It’s simple to make.
Crochet Radiating Star Throw This throw is big, with a 60″ diameter. It uses Bernat Super Value Big Stripes in Warm Patina.

There are endless possibilities with crochet star projects. You can keep making stars to use in your projects.

How to Vary the Size of Your Crochet Star

Creating a unique crochet star means you can change its size. You can do this by using different yarn weights and hook sizes. For example, using a thicker yarn like Whims Merino with a big hook makes the star bigger.

Crochet Star Size Variation

For a smaller star, use thin yarn and a smaller hook. This method helps you get precise results. Crocheting with different yarn weights lets you customize your star in many ways.

Star Variation Type Stitch Count Hook Size Yarn Types
Small Star 10 half double crochets 4mm Whims Merino
Regular Star 35 stitches Furls Cookies and Cream Streamline Swirl (size H) Wool of the Andes Worsted
Large Star 50 stitches 8mm Whims Merino
Captain America Shield 60 stitches 8mm Wool of the Andes Worsted

Crocheting with different yarn weights lets you explore crochet star size variation deeply. For a Small Star, stop at five loops on the hook. This makes the star smaller. For a Big Star, pick up an extra loop to make it bulkier.

Knowing these variations makes your crochet projects more creative and flexible. You can easily make stars of any size.

Finishing Touches: Blocking and Stiffening Your Star

Finishing your crochet star with blocking and stiffening makes it look better and last longer. These steps make your star look polished and keep its shape for years.

Blocking Your Star

Blocking is key to getting your crochet star just right. You can use simple finger adjustments or wet-blocking. It makes your star look sharp and neat.

Block your star by pinning it on a foam board or mat. Make sure each point is spread out evenly.

  • Use approximately 54 pins for a 6-point star.
  • The size range of crocheted stars usually falls between 3.5″ to 4″ in diameter with size 10 thread.
  • The average number of pins required per star is around 60.

After pinning, lightly spray the star with water or use a damp cloth. Let it dry completely, which might take up to 24 hours.

Stiffening Techniques

Wondering how to stiffen crochet stars? There are many ways to make your stars firm. One method is mixing PVA glue with water. Soak your star in this solution, then pin it back onto your blocking board.

  • Time required per star stiffening: 15-20 minutes.
  • Drying time for stiffened stars: Up to 24 hours.
  • Number of stars stiffened in an average tutorial: 9.

Another option is using spray starch. It gives a stiff finish but might need reapplication after washing.

For more beginner crochet projects and tutorials, check out this comprehensive guide.

Blocking and Stiffening Aerosol Sprays Price Volume Drying Time User Rating
Aleene’s Stiffen-Quick $5.49 8 fl oz 24 hours 4.7/5
Stiffy by Plaid $4.99 12 fl oz Up to 36 hours 4.5/5
Mary Ellen’s Best Press $6.99 16 fl oz 24 hours 4.8/5

Mastering these crochet star finishing techniques will help you create beautiful, lasting decorations for any season.

Conclusion

Finishing your crochet star project shows how simple and creative it can be. You’ve turned basic yarn and a hook into a beautiful star in just 10 minutes. This project lets you show off your skills and personal style, whether making a small or large star.

Now, you can decorate your home or give these stars as gifts. They’re perfect for Christmas decorations or baby blankets. You’ve made something special with just yarn and a hook.

If this guide inspired you, there’s more to explore. Check out this tutorial for more star patterns. Each star is a small victory and a lovely addition to your space. Happy crocheting, and may your stars bring joy and light.

FAQ

What materials and tools do I need to crochet a star?

You’ll need about 6 yards of medium-weight yarn and a 5 mm hook. Also, have scissors and a yarn needle ready. You can use leftover yarn and adjust the hook size for different star sizes.

What types of yarn are best for crocheting a star?

Choose yarns that match the look you want. Medium and bulky yarns work well. Brittany from B.Hooked Crochet likes fluffy Homespun and super bulky Go For Faux yarn. She also made a star with Bernat Maker yarn and an 8mm hook.

How do I choose the right hook size for my crochet star?

The yarn label usually suggests a hook size. But, using a larger hook can make your star look better and reduce curling.

Are there video tutorials available for crocheting a star?

Yes, there are video tutorials. Brittany from B.Hooked Crochet has a detailed video for both right and left-handed crafters. It shows how to make a crochet star step by step.

What is the basic pattern for crocheting a star?

The pattern has two rounds. The first round is a ring of chain stitches, double crochets, and chain spaces. The second round builds the star points with chain stitches and different crochets, ending with a slip stitch.

How can I vary the size of my crochet star?

Change the yarn weight and hook size to vary the star size. Use bulkier yarn and a larger hook for a bigger star. For a smaller star, choose lighter yarn and a smaller hook. A larger hook size can also make the star flatter.

What are some tips for perfecting my crochet star?

Count your stitches carefully and adjust the hook and yarn as needed. Gauge and size checks are key for the right size. Try different materials to get the look you want.

How can I use my crochet stars creatively?

Crochet stars are versatile. Use them as festive decorations or ornaments. They can even be mounted in picture frames for handmade art.

What is the process for blocking and stiffening a crochet star?

Blocking refines the star’s shape. You can use finger adjustments or wet-blocking. To stiffen it, mix PVA glue with water or use spray starch. These methods are great for ornaments and hanging decorations.

Source Links

Fast Crochet Stitches

Boost Your Crochet Speed: How to Crochet Faster

Ever felt like you’re falling behind on a crochet project? Your fingers stumbling as time ticks on? Imagine your project growing fast, with each stitch perfectly in place. How to Crochet Faster is not just a dream. It’s a skill you can learn and improve. I’m here to share Crochet Techniques and Fast Crochet Stitches to speed up your craft and make crocheting more fun.

One key to faster crochet is mastering the yarn’s center-pull. This method gives you smoother stitches and keeps your momentum going. Add a great work environment, and you’ll crochet a bit faster.

Key Takeaways

  • Mastering the center-pull from a yarn skein can drastically enhance your stitching efficiency.
  • Investing in the right tools, like ergonomic crochet hooks and yarn bowls, can minimize interruptions and hand strain for speedier sessions.
  • Understanding the impact of yarn tension and proper posture is critical for consistent and swift crocheting.
  • Familiar patterns and muscle memory go hand-in-hand with a tidy workstation to boost your crochet momentum.
  • Accommodate your crocheting style by selecting hooks and yarns that align with your speed goals.
  • A relaxed atmosphere, possibly with a rhythmical music backdrop, can contribute significantly to your crocheting pace.
  • Practicing new stitches and regularly stretching hands and wrists are essential for agility and increased crocheting speed.

Discover the Benefits of Mastering Yarn Tension for Crochet Speed

Learning to control yarn tension is key to boosting your crochet speed, crochet productivity, and crochet efficiency. It helps you stitch smoothly and evenly. This is crucial for your projects’ look and for keeping a steady crochet pace.

When I first started crocheting, I learned how vital yarn tension is. It’s the secret to making beautiful, professional-looking crafts quickly and with less effort.

Understanding Yarn Tension

Good yarn tension means the yarn flows well but still holds tight stitches. The right yarn weight is important. Medium-weight yarns, marked as ‘4’, are best because they’re easy to handle and show well, helping you crochet faster.

Adjusting Tension Mid-Project

As you crochet, you might need to adjust your yarn handling. For example, slippery yarns might need a tighter grip to avoid loose stitches. Making these adjustments is key to keeping your stitches even and consistent, which boosts your speed and skill.

Practicing Consistency for Faster Results

Being consistent with yarn tension can turn your crocheting into a skilled craft. Using stitches like the double crochet can speed up your work. But, keeping your yarn tension even is crucial for these stitches to work well. I find using stitch markers every 20 stitches helps keep my work both fast and accurate.

Technique/Tips Benefit
Using medium-weight yarn Boosts visibility and control
Adjusting grip for slippery yarns Prevents uneven stitches and increases productivity
Practicing double crochet stitches Enhances project speed through quicker stitch completion
Placing stitch markers Ensures consistent stitch count and tension

By mastering yarn tension, you not only get faster at crocheting but also enjoy your projects more. Whether it’s a simple dishcloth or a complex afghan, managing tension is key to success in all your crochet projects.

How to Crochet Faster by Streamlining Your Workspace

Setting up a good workspace is more than just putting your crochet tools in order. It’s about making a workflow that boosts your productivity and enhances your crocheting experience. For beginners, knowing the right tools and how to arrange them can make your projects easier and save time.

Using the right accessories can make a big difference. Ergonomic hooks help reduce hand and wrist strain, letting you crochet longer without pain. Yarn cakes are compact, center-pull balls that prevent tangling and make yarn flow smoothly. Tools like stitch counters and row counters help you keep track of your progress without stopping.

To keep your space organized, clear storage bins and yarn bowls are key. Transparent bins make it easy to find and use different yarn colors. Yarn bowls keep your yarn feed steady and tangle-free. Tension rings help you keep consistent tension for even stitches. Stitch dictionaries let you customize patterns on the fly.

Tool Benefit Usage Frequency
Ergonomic Hooks Reduce hand strain Regularly by 90% beginners and experts
Yarn Cakes Minimize tangling Often by 75% of users
Stitch Markers Mark key points in patterns Sometimes by 60% of crocheters
Yarn Bowls Keep yarn tidy Frequently by 70% of crafters
Row Counters Track project progress Always by 80% for complex patterns

Using digital solutions can also save time. Many crocheters use digital pattern storage and apps like Ravelry or Craftsy. These tools make it easier to manage patterns and yarn, speeding up project setup.

A well-planned workspace boosts your efficiency and enjoyment of crocheting. Spending time on optimizing your space pays off in faster project completion and more satisfaction.

Choosing the Right Crochet Hook for Speed Enhancement

To improve your crochet efficiency and master fast crochet stitches, picking the right crochet hook is crucial. I’ve tried many hooks from top brands. But, Clover Amour hooks are my go-to because of their smooth glide and ergonomic design.

The design of a crochet hook affects your speed and comfort. Each part, from the hook’s point to the handle, is important. For example, a hook’s lip and throat need to be smooth but also grab the yarn well. This helps you crochet faster and more consistently.

Material Features Best For
Aluminum/Steel Durability, smoothness Frequent use, varied projects
Plastic/Resin Lightweight, colorful Beginners, quick projects
Wood/Bamboo Warmth, flexibility Arthritic hands, natural feel

The shape of the hook’s tip also matters. Inline hooks, like those from Susan Bates, help you get consistent stitches. Tapered hooks, from Boye and Clover, are great for faster crocheting and less yarn splitting.

Different grip styles, like knife and pencil grips, affect your comfort and speed. It’s important to pick a handle that fits your grip style. For example, Peach&Paige’s narrow handles are perfect for those who like a tight grip, making crocheting faster.

Whether you’re new or experienced, don’t buy a whole set of hooks at once. Start with one or two sizes for your yarn and try different brands. This way, you can find what works best for you and build a collection that meets your needs.

In conclusion, choosing the right crochet hook is essential for faster and more enjoyable projects. It’s not just about speed, but also about comfort and enjoying every stitch.

Optimizing Crochet Techniques for Enhanced Speed

To get faster at crocheting, you need skill, the right tools, and a good environment. We’ll look at ways to speed up your crochet, focusing on grip styles, hand movements, and cutting down on extra motions.

Pencil vs. Knife Grip: Which Is Faster?

Choosing between the pencil and knife grip can really affect your speed. The knife grip is often better for thicker yarns because it gives more control. On the other hand, the pencil grip is quicker for detailed work where you need precision.

Creating Fluid Hand Movements

To speed up your crochet, it’s key to move your hands smoothly. Holding your hook and yarn right can help reduce hand strain. This makes crocheting faster and keeps your stitches even.

Minimizing Motion for Maximizing Crochet Speed

Reducing extra hand movements is crucial for faster crochet. Simplifying stitches and using your non-dominant hand less can speed things up. This also makes your stitches more even and your tension better.

Optimized Crochet Techniques

Here’s how different grips and techniques can affect your crochet speed:

Technique Speed Influence User Comfort Recommended For
Knife Grip Faster with thick yarns High Larger projects
Pencil Grip Faster for detailed work Medium Fine or intricate designs
Fluid Hand Movements Increases overall speed High Long crocheting sessions
Minimized Motion Maximizes Efficiency High Repetitive patterns

By using the right crochet techniques, you can really improve your speed and efficiency. It doesn’t matter if you use the knife or pencil grip. The most important thing is to practice regularly and move smoothly for the best results.

Effective Ways to Manage Your Crochet Time-Saving Tips

As a passionate crocheter, I’ve found that using crochet time-saving tips greatly improves my crochet productivity and crochet efficiency. Whether you’re new or experienced, smart strategies can make a big difference. Here are some top tips for saving time while crocheting.

Using stitch markers is a big help. They save you from counting stitches over and over, especially in big projects. Many crocheters, 87%, say stitch markers get lost easily. So, I use bobby pins, like 65% of crocheters, for a convenient and always-available option. Also, using row counters or apps helps track your progress without mistakes.

Pre-pulling yarn before you start is another trick I use. It stops tangling issues and keeps me focused. Keeping your tools and materials organized also helps. I use color-coordinated bags and clips, which 78% and 25% of crocheters find useful, to keep everything tidy and easy to find.

Lastly, taking care of your crochet health is key. I use ergonomic hooks, like the Furls Streamline, to avoid pain. I also take breaks to stretch or do light exercises. This helps prevent strain in our wrists, arms, and shoulders.

In today’s fast-paced world, using these crochet time-saving tips can greatly improve your crafting sessions. Happy crocheting!

Incorporating Fast Crochet Stitches into Your Projects

As a passionate crocheter, using fast crochet stitches and crochet techniques can make your projects faster and more fun. These tips help you finish your projects quicker and enjoy the process more. Here’s how to crochet faster without losing quality or beauty.

Identifying Quick Stitches

Choosing the right stitches is key to speeding up your crochet. Stitches like the granny stripe or tall stitches like the US treble and double treble cover more area quickly. They are easy to remember and fast to do.

Combining Speedy Techniques with Popular Patterns

Adding fast stitches to popular patterns makes your projects faster and more detailed. Using airy or reversible stitches adds beauty and function. Mixing these stitches with favorite yarns like Lion Brand or Red Heart Super Saver is a great idea.

Designers like Desert Blossom Crafts create quick and beautiful crochet patterns. Following their designs can inspire you to use fast stitches in your projects.

Yarn Brand Stitch Type Recommended Hook Complexity
Lion Brand US Treble 6 mm Beginner
Caron Simply Soft Double Treble 7 mm Beginner-Intermediate
Red Heart Super Saver Reversible Textured 5.5 mm Intermediate

Always do a gauge swatch before trying a new stitch or yarn. This is especially important with bulkier yarns or different crochet techniques.

Fast Crochet Stitches

Using quick stitches and techniques makes crocheting more efficient and rewarding. As you try these tips, you’ll see your skills improve. Start experimenting today and watch your crocheting skills grow with each project!

Boost Productivity: Crocheting for Beginners and Experts Alike

Boosting your crochet productivity can change your crafting experience. It doesn’t matter if you’re new or have been crocheting for years. Both beginners and experts can get better at crocheting. This can make your time spent on this craft more enjoyable.

Mastering your stitches is the first step to being more productive. It builds muscle memory and ensures your yarn flows smoothly. It’s like playing an instrument – the more you practice, the better you get.

Choosing the right tools is also key. Trying out different hooks can help you find what works best for you. I’ve found that using ergonomic hooks makes crocheting faster and more comfortable.

Keeping your workspace organized is important too. A tidy area means you spend less time looking for things and more time crocheting. It helps you stay focused and creative.

Planning your time is crucial. Set aside specific times for crocheting to manage your projects better. For complex patterns, choose quieter times to avoid distractions.

Remember to take breaks and set achievable goals. This prevents burnout and keeps crocheting fun. Enjoy the journey as much as the end result. Whether making a simple scarf or a big afghan, keep a steady pace.

For more inspiration and resources, check out Hemptique. They offer patterns and tips to improve your crochet skills.

How to Crochet Faster: Transitioning from Basic to Advanced Methods

Starting your journey from basic to advanced crochet is exciting and rewarding. To get faster, you need to build a strong foundation. This foundation is key to mastering complex patterns and stitches.

The wide range of patterns can inspire you as you improve. Start with simple stitches that are quick and easy. As you get better, try more complex projects.

Building on Foundation Skills

First, learn basic stitches well. Keeping your yarn tension right is key for speed and quality. This rhythm is important as you move to more advanced methods.

Accelerating Through Advanced Techniques

When you’re good with basic stitches, it’s time to get better. Try techniques like the Mattress Stitch for better seams. These methods make your projects look great and save time.

Technique Speed Benefit Skill Level
Basic Stitches Quick execution Beginner
Mattress Stitch Seaming Efficient finishing Intermediate
Textured Seams Advanced detailing Advanced

Going from simple to complex projects means learning new stitches and seaming. This growth makes you faster and your work more beautiful. Every stitch adds to the beauty of your crochet.

Elevating Crochet Efficiency with Organized Yarn Storage

As a passionate crocheter, I’ve learned that organizing yarn boosts crochet productivity and crochet efficiency. It not only makes my space look better but also helps me crochet faster. I’ve tried different storage solutions that have made my crocheting sessions more efficient.

To solve the problem of tangled yarn, I used a modified wine rack. It’s 35 3/4″ high, 34 7/8″ wide, and 9 11/16″ deep. It has 12 cubbies and holds over 100 skeins of yarn. This keeps my yarn organized and easy to reach, which is key for a smooth workflow.

Using a Stanwood Needlecraft Large Metal Yarn/Fiber/Wool/String Ball Winder has been a big help. It lets me wind yarn balls in under an hour, saving me time. For quick projects, I use a Threshold Color Block Round Woven Basket from Target. It keeps my wound yarn balls within reach.

  • For small accessories like buttons, I use glass gasket jars from Storables. They help me organize by color and size, making it easier to find what I need for intricate projects.
  • For bigger storage needs, I use Cube Storage Organizers, Wire Cube Organizers, and 3-Tier Stackable Shelves. These give me plenty of space and can grow with my projects.
  • Decorative baskets and hanging shoe organizers, like the Gorilla Grip Mesh and Fabric Cubed variants, add beauty and function. They keep my crochet tools and smaller yarn skeins tidy and easy to find.

Organizing my yarn storage has not only cleaned up my space but also my mind. It makes my crafting experience smoother and more enjoyable. This organized way of working significantly boosts my crochet productivity.

Crochet Productivity: Tips for Keeping Up the Momentum

As a crochet lover, I’ve learned how important staying productive is. It helps us balance life and craft. By using tips for crochet speed, productivity, and saving time, we improve our skills and lifestyle.

Maintaining Focus Through Long Projects

Long crochet projects need dedication and planning. Breaking them into smaller parts helps keep the momentum. Using a project tracker boosts motivation.

Dedicating time for crochet, like during the Crochet CEO Confab, is key. It lets us focus on crochet even when busy.

Tackling Complex Patterns with Ease

For complex patterns, a structured schedule is crucial. I start my day with self-care, like meditation and walking my dog. This refreshes my mind for the day’s tasks.

Morning mindfulness helps me stay focused and reduce stress. This makes my crochet sessions smoother.

Activity Time Productivity Impact
Self-Care and Mindfulness 6:30 AM – 7:30 AM Prepares mental focus and reduces stress
Crochet CEO Confab 9:00 AM – 11:00 AM Undisturbed crochet productivity time
Daily Crochet Minimum Flexible Time Slot Ensures daily progress and maintains the flow state

Crochet helps us enter flow states, improving our minds and well-being. Regular crochet sessions improve focus and solve complex patterns. Each stitch helps us handle life’s challenges better.

To make the most of our crochet time, we should avoid distractions. Good stitch markers and keeping tools handy save time. Finishing ends quickly keeps our workflow smooth.

Conclusion

Exploring how to crochet faster, we found that efficiency comes from many parts. Choosing the right hook and mastering techniques are key. Our journey started with yarn tension, showing how it’s crucial for even stitches and speed.

Learning about different stitches, like the double crochet, showed they can be faster than single crochet. This is backed by data. Yet, crochet is special because it makes fabric quickly without using more yarn. This makes crochet a joy to do, creating something beautiful.

For beginners, patterns and tutorials on the Secret Yarnery are great. They help anyone start this rewarding hobby.

For beginners or experts, the secret to crocheting faster is practice and love. Doing it often makes us better and fills our work with personal touch. Let’s use these tips to make our crochet projects more efficient and fun.

FAQ

What techniques can I use to crochet faster?

To crochet faster, focus on mastering yarn tension. Make sure your workspace is organized. Choose the right hook and practice good grip and hand movements.

Try fast stitches and practice both simple and complex patterns. This will help you crochet faster.

How does yarn tension affect my crochet speed?

Yarn tension is key to faster crochet. It makes yarn flow smoothly through your fingers. This leads to quicker, consistent stitches.

Proper tension prevents stitches from being too tight or too loose. This keeps your work quality high and your speed up.

What can I do to maintain even tension throughout my crochet project?

To keep even tension, hold the yarn and hook comfortably. Adjust your grip as needed. Focus on consistent hand placement and movement.

Take breaks to avoid hand fatigue. This can cause uneven tension.

What are the best crochet hooks for speed?

For speed, use hooks that glide through yarn easily. Brushed aluminum is a good choice. Ergonomic hooks also reduce hand strain.

Choose the right size and shape for your project. This ensures faster crocheting.

Does the way I hold my crochet hook really impact my speed?

Yes, your hook grip affects your speed. A comfortable grip leads to smoother hand movements. This is crucial for faster crocheting.

Can time-management tools help me crochet faster?

Yes! Tools like stitch markers and row counters save time. They help you track progress without counting stitches. Using these tools well is key to managing your time.

What are some fast crochet stitches I can use to speed up my projects?

Stitches like the granny stripe or simple double crochet speed up your work. They’re easy to repeat and memorize. This lets you crochet faster without looking at patterns.

How can beginners increase their crochet productivity?

Beginners can boost productivity by practicing stitches. This builds muscle memory. Ensure proper tension and avoid distractions.

Try different hooks and grips to find what works best for you. This can also speed up your crochet.

What strategies should I adopt to crochet faster when transitioning to advanced techniques?

For advanced techniques, start with a solid foundation in basic stitches. Practice a consistent tension. Find a rhythm with familiar patterns.

This will help you crochet faster when tackling complex projects.

How can yarn storage solutions help improve my crochet efficiency?

Yarn storage solutions like yarn bowls and project bags keep things organized. This prevents tangling. It allows for smooth yarn flow and reduces interruptions.

This improves your crochet efficiency.

What are some productivity tips for maintaining momentum in long crochet projects?

For long projects, memorize pattern repeats and use stitch markers. Set up an organized workspace. Manage your yarn to prevent tangles.

Use center-pull balls for continuous, efficient crochet.

Source Links

Avoiding Crochet Mistakes

Common Crochet Mistakes and How to Avoid Them

As someone who’s journeyed through the loops and knots of crochet, I’ve seen how each stitch can add to the narrative of our creations. But what happens when unintended crochet mistakes start rewriting that story? It’s a common misconception that only novices face crochet blunders. In truth, from my own oops moments to the collective experiences of many crafters, we’re all susceptible to the occasional crochet mishap, regardless of our skill level.

I’ve learned that those oops moments—whether they be accidental stitches, gauge inconsistencies, or just the wrong shade of yarn—can become treasured parts of our crochet journey, especially when we know the crochet troubleshooting steps to take. Even something as seemingly minor as choosing a slightly different hook size or yarn weight can spin your project’s story in a whole new direction, which is why knowing the nuances of crochet fixing is so crucial.

So let’s unravel these knots together. I’ll share the wisdom I’ve gathered from my time with the hook, from understanding the true importance of a gauge swatch to recognizing the pitfalls of not reading through your crochet pattern thoroughly before beginning. My aim is to guide you through the maze of common crochet repair techniques, helping you hold onto the joy of the craft without the frustration of unexpected turns.

Let’s dive into the stitches and explore how to bring precision, joy, and a sense of accomplishment to every piece we create, ensuring that the story your project tells is exactly the one you intended.

Key Takeaways

  • Understanding the significance of stitch definition, and why I stand by 100% cotton yarn for 80% of my projects.
  • Learning the importance of using online reviews and recommendations to choose the best yarn for quality and drape.
  • Start your projects right: Why I always reach for a larger hook on that foundational chain.
  • The vital habit of weaving in ends with at least 5-6 inches of yarn to ward off those fraying nightmares.
  • Mastering basic crochet stitches as pivotal stepping stones for tackling most patterns.
  • Embracing the learning curve—how my past flops have shaped my current expertise.
  • Why patience and consistent practice are your best allies in becoming a crochet virtuoso.

Understanding Basic Stitch Techniques

Improving your crochet skills starts with mastering basic stitches. Knowing how to do stitches right can make your projects better. Many beginners face problems early on, but with practice, you can avoid these issues.

Mastering Both Loop Crocheting

One common mistake is not using both loops of a stitch. This can make your seams weak. Start with a chain of 22 stitches to practice. It helps you learn the right way to crochet and makes your fabric stronger.

Recognizing the Importance of Gauge Swatches

Not making gauge swatches is a big mistake. They help you check if your crochet is the right size. Without them, your projects might not fit right or look uneven. If you’re unsure, look at tutorials here for help.

Common Issue Frequency Impact on Project
Crocheting only in the front loop High among beginners Weak seams, less structured products
Skipping gauge swatch Common Incorrect project size and fit

Mastering crochet means fixing mistakes from the start. Practice basic stitches and gauge swatches to improve. Every stitch you make brings you closer to being a better crocheter.

Managing Project Consistency

Understanding how to keep your crochet projects consistent is key. Often, mistakes come from small errors like wrong stitch or row counting. These mistakes can cause a lot of frustration and need a lot of fixing.

Counting Stitches to Maintain Shape

To stop projects from getting bigger or smaller, you need to count stitches right. This keeps each row the same, stopping your project from changing size. I find using stitch markers or a simple count on paper really helps in fixing mistakes.

Here are some tips for better stitch counting:

  • Use brightly colored stitch markers to mark the start or end of patterns.
  • A digital row counter is great for big projects.
  • Always check your work against the pattern, especially after tricky parts.

Counting Rows for Even Progression

Counting rows is just as important. If you count wrong, your project might be too long or too short. This can mess up the shape and look of your work. Counting rows carefully can save you from having to rip out hours of work.

Here’s how to keep track of your rows:

  • Make a small mark on paper or use a row counting app each time you finish a row.
  • Use a different color of yarn every 5th or 10th row to help you see where you are.
  • Check your row count at the end of each session to make sure it’s right.

In summary, to fix mistakes or improve your crochet, focus on counting stitches and rows carefully. This keeps your projects the right size and shape. It also makes your crochet work better and more enjoyable.

Interpreting Crochet Patterns Accurately

Learning to read crochet patterns well is key to avoiding mistakes. At first, I didn’t know how much yarn I needed or the right stitch size. This led to errors. To fix this, I started by carefully reading the pattern before starting to crochet.

One mistake I made was not knowing that a turning chain counts as a stitch. I also didn’t adjust the chain length for different stitch heights. Here’s a simple guide to help you understand basic crochet pattern instructions and abbreviations:

Abbreviation Meaning
Ch Chain
Sl st Slip Stitch
Sc Single Crochet
Hdc Half Double Crochet
Dc Double Crochet
Tr Triple or Treble Crochet
Inc Increase
Dec Decrease
Turn To Turn Your Work
Join To Join Two Stitches Together
Rep To Repeat a Step

Symbols like asterisks (*), brackets [ ], and parentheses () are also important. An asterisk means to repeat steps in a row. Brackets show how many times to do a step. Parentheses group stitches to be worked together. Knowing these symbols helps keep your pattern correct and your project looking good.

It’s also important to watch your stitch counts and gauges. I always count my stitches every few rows, especially if I’m new to crochet. This keeps my project consistent with the pattern. And if you’re unsure about a step, it’s best to ask for help to make sure your crochet project looks great.

Choosing the Right Materials

When you start crocheting, picking the right materials is key. It helps you fix crochet mistakes, avoid common errors, and make your project look great. Knowing how to pick the best yarn and hooks is essential.

Yarn Weight: Ensuring Pattern Conformity

Choosing the right yarn weight is crucial for your project’s look and feel. Yarns vary in weight, which affects their thickness. Beginners often find worsted weight yarn, labeled as #4, the easiest to work with.

It’s perfect for learning stitches and creating beautiful patterns. However, lighter or thicker yarns can be harder to handle for beginners. They need different techniques and adjustments in tension.

The table below shows different yarn weights and their uses:

Yarn Weight Number Description Common Uses
1 – 3 Thin yarns (light to DK) Delicate projects like doilies or fine garments
4 Worsted (Medium weight) Most accessories, sweaters, and home décor items
5 – 7 Bulky to super bulky Thick blankets, scarves, and winter gear

Selecting the Correct Hook Size

Choosing the right hook size is also important. Using the wrong hook can lead to tight or loose stitches. Hooks vary from small for lace to large for chunky yarns.

Beginners often start with a 5mm hook for worsted weight yarn. This size is easy to handle and helps keep stitches even.

Choosing the right materials is not just about looks. It also affects your project’s durability. Try a swatch to see how yarn works with different hooks. This helps avoid mistakes.

Distinguishing Between US and UK Crochet Terms

As a devoted crocheter, knowing the difference between US and UK crochet terms is key. It helps avoid common mistakes and improves your repair skills. This knowledge is especially helpful when working with patterns from different places.

Journey through Understanding Crochet Terms: Knowing whether a pattern uses US or UK terms is crucial. The same terms can mean different stitches in each system. This can lead to confusion and mistakes.

For example, ‘single crochet’ in the US is ‘double crochet’ in the UK. The US ‘double crochet’ is ‘treble’ in the UK. This affects the stitch type, size, and look of your project.

It’s important to look for clues like “color” or “colour” and yarn weight descriptions. Also, check if measurements are in centimeters or inches.

Statistical Insights Percentage
Percentage of crocheters confused by US/UK term differences 65%
Patterns specifying American or British terms on Craftsy 75%
Craftsy designers offering multiple terminology versions 30%
Crocheters who find terminology charts useful 85%

The data shows how important clear pattern writing is. Reference tools like conversion charts are crucial for 85% of crafters. They help when working on Craftsy or with designs from different countries.

Always check for key terms and notation differences in patterns. Learning these differences helps avoid mistakes. It also makes you a better crocheter, ensuring your projects are precise and skilled.

Crochet Mistakes

Mistakes happen in crochet, whether you’re new or experienced. Knowing how to fix common errors is key. This part will show you how to handle crochet troubleshooting for basic skills and keeping your projects in shape.

Correcting Foundation Chain Errors

The foundation chain often trips up beginners. A small mistake here can mess up your whole project. Start by carefully counting your chains. If you make a mistake, it’s better to start over than to fix it later.

Being too tight or loose in the starting chain can cause problems. It affects how easy it is to work into the chain and can make edges uneven. Getting the tension right here is important for the rest of your project.

Preventing Shape Distortion in Projects

To avoid shape problems, pay close attention to stitch counts. Each row should have the exact number of stitches. If you make a mistake, it can make your project grow or shrink. Use stitch markers to keep track of your stitches and catch errors early.

Also, make sure your turning chains are the right size. They should match the rest of your stitches perfectly. This is important for the shape and edge of your project.

Crochet Fixing

To improve your crochet troubleshooting, always make a gauge swatch. It helps you see if your hook size and yarn weight are right for your project. This way, you can make changes early on.

It’s also important to know the difference between U.S. and U.K. crochet terms. Using the wrong terms can mess up your project. This is a common mistake that can stop your project in its tracks.

With these tips, you’ll get better at fixing mistakes and making beautiful crochet pieces. Every stitch is important, and the joy of crochet comes from the skill and patience you put into it.

Perfecting Crochet Finishing Techniques

The final steps of a crochet project are just as important as the start. Finishing your crochet right makes it look better and last longer. We’ll cover key techniques like weaving in ends and the magic loop to help you avoid common mistakes.

Weaving End Tips for a Clean Finish

Securing yarn ends is a big challenge in crochet. A good way to keep them from coming undone is to weave them back through your stitches. Use a yarn needle for about three to four inches. This method keeps your work neat and prevents loose ends.

For those who love visuals, check out this guide on crochet repair for more details.

Understanding the Magic Loop and Starting Chains

Starting your crochet project right is key. The magic loop method is cleaner and more flexible than traditional methods. It’s great for projects like hats and amigurumi because it prevents holes and lets you adjust sizes.

Using a slightly bigger hook for the foundation chain helps too. It stops the starting chain from getting too tight. This is important to avoid a tight base in your projects.

As you get better at crochet, remember that fixing mistakes is just as important as making them. Improving your finishing techniques makes your projects look and feel better. Keep practicing to make your crochet work look professional.

Learning to ‘See’ Your Stitches and Count Correctly

Many beginners struggle with stitch counts, which can mess up their crochet projects. It’s key to learn how to count and see each stitch correctly. This helps avoid common mistakes.

Counting stitches is a vital skill in crochet. It ensures your work turns out right. Self-taught crocheters often make mistakes because they don’t focus on counting stitches. To avoid these errors, it’s important to learn how to count stitches properly from the start.

  • Chainless Starting Stitches can prevent miscounts and maintain straight edges.
  • Implement stitch markers at the end of rounds to manage your stitch count effectively.

Following a pattern with clear stitch count instructions helps avoid mistakes. This way, you’re less likely to add or skip stitches.

Crochet Mishaps and Proper Count

Common Issue Main Cause Preventive Tips
Adding Stitches Failure to identify each stitch correctly Regularly count stitches, use markers
Skipping Stitches Misplacing the first stitch of a row Ensure foundational chains are precise
Uneven Edges Not counting the turning chain as a stitch Clarify pattern instructions regarding chains

Many beginners are unsure if the turning chain should be counted as a stitch. The answer depends on the pattern. Knowing this can prevent mistakes that lead to gaps in your work.

To avoid mistakes, make stitch counts a habit. This way, you can ensure accuracy and avoid redoing large parts of your work. It makes your crochet journey smoother and more enjoyable.

Conclusion

We’ve looked at common mistakes in crocheting, especially for beginners. The secret to avoiding these errors is to keep practicing and stay committed. Remember, fixing crochet mistakes is a journey, not just a goal.

Every stitch and yarn over is a chance to learn and improve. Choosing the right hook and yarn, and keeping tension even, are key. These steps help you avoid the need for crochet repair.

Even with careful planning, we all face crochet flaws. Maybe your granny squares aren’t perfect, or your scarves grow unexpectedly. These issues teach us to pay attention to detail and understand crochet better.

For those struggling with gauge or unclear patterns, don’t worry. Every finished project brings you closer to your crochet goals. It’s a journey of learning and growth.

To all crocheters out there, keep a stash of supplies and study your patterns well. Each time you fix a mistake, you show your dedication and skill. So, keep crocheting and remember, every stitch is important.

When people admire your work, it makes all the effort worth it. Keep creating, and your hands will make even more beautiful things.

FAQ

What are some common crochet mistakes and how can I avoid them?

Common mistakes include crocheting only in the front loop and not making gauge swatches. Also, not accurately counting stitches and rows can cause shape distortion. To avoid these, crochet under both loops unless told otherwise. Practice making gauge swatches to ensure the right tension. Count stitches and rows carefully to keep your project consistent.

Why is mastering both loop crocheting important?

Crocheting through both loops makes your fabric stronger and more stable. It also keeps your work from stretching out of shape. This technique is key for the durability and look of your crochet pieces.

How do gauge swatches affect my crochet projects?

Gauge swatches help you check if you’re working at the right tension. This is crucial for the size and fit of your project. Always make a gauge swatch at the start of a new project, especially when using a different yarn.

Why is counting stitches and rows important in crochet?

Counting stitches and rows keeps your project the right size and shape. If you get this wrong, your work might grow or shrink, which can be frustrating. It helps keep your crochet even and symmetrical.

How can I ensure my crochet project progresses evenly?

To keep your project even, count rows and use markers or a notepad. Pay attention to pattern instructions on turning chains and stitch placements. This helps keep your work even and well-shaped.

How can I avoid crochet mishaps when interpreting patterns?

Read the pattern carefully before starting. Get to know any new stitches or techniques. Look for special instructions, like how to count the turning chain. Also, understand the pattern’s stitch count and shape to avoid mistakes.

How does yarn weight affect the outcome of my crochet pattern?

Yarn weight changes the gauge, size, and drape of your project. If you use a different yarn without adjusting, your project will change a lot. Always make a gauge swatch when changing yarns to match the pattern.

Why is selecting the correct hook size crucial for my crochet project?

The right hook size gives your stitches the correct tension and size. Using the wrong hook can make your project not fit right. Use the hook size recommended or find the right one with a gauge swatch.

How do I distinguish between US and UK crochet terms?

US and UK crochet terms are different. For example, a single crochet in the US is a double crochet in the UK. Always check the pattern to know which terms to use to avoid mistakes.

How can I correct foundation chain errors?

To fix foundation chain errors, count your chains carefully before starting. Make sure you’re not missing or adding any. If your chain is too tight or loose, adjust your hook size or tension.

What should I do to prevent shape distortion in my crochet projects?

To avoid shape distortion, place the first stitch correctly in each row. Always count your stitches in every row. Use stitch markers to keep your work straight and consistent.

How should I weave in ends for a clean finish?

Weave in your ends by threading the tail back and forth through stitches on the wrong side. Make sure to go in several directions to prevent unraveling. You can tie a small knot before weaving in for extra security.

Why is understanding the magic loop and starting chains important?

The magic loop technique helps with a tighter start when working in the round. This is key for amigurumi and hats. Mastering starting chains is important because they set the foundation of your project. Too tight chains can warp it, while too loose can make it sloppy.

How can I learn to ‘see’ my stitches and count them accurately?

Learning to ‘see’ your stitches takes practice. Get familiar with how each stitch looks and where to insert your hook. Counting accurately means paying attention to the top of stitches and the turning chain. Use tally marks or markers to track your stitch count.

Source Links

Crochet supplies and yarn

Learn How to Crochet: Beginner’s Guide

As I start learning crochet, I remember the tradition that has drawn many to it. It’s not just about making loops and knots. It’s a craft that adds beauty and warmth to our lives.

Let’s dive into the world of crochet together. It’s a craft loved for centuries and still popular today. Learning how to crochet opens up a world of possibilities. You can make everything from cozy blankets to chic scarves with just a few basic supplies.

Ever wondered what materials are best for beginners? For starters, medium-weight yarn is perfect. It’s like finding your balance. A G6 (4.25 mm) or H8 (5.00 mm) hook is also great. But where do you start? Check out Secret Yarnery’s easy crochet beginner patterns for a smooth start.

Key Takeaways

  • Crochet is an immensely satisfying and timeless hobby suitable for all skill levels.
  • Start your journey with medium-weight yarn and an ergonomic hook for comfortable learning.
  • Whether it’s the pencil or the knife grip, knowing how to hold your crochet hook is crucial.
  • Mastering the slip knot and basic crochet chain are foundational skills for any crochet project.
  • Understanding U.S. crochet terminology is key for beginners following patterns and tutorials.
  • With determination and the right resources, you can go from novice to crafting intricate designs.
  • Embark on a craft that allows you to create functional and aesthetically pleasing items with simple tools.

The Timeless Craft of Crochet and its Resurgence

Crochet has been a beloved craft for centuries, loved by many. It’s not just about the intricate stitches. It’s also about the joy of making something by hand and the value of sustainable fashion.

The Rich History of Crochet

Crochet has a long history, starting in ancient Egypt. It grew in popularity in the 19th century with new patterns. Irish and Filet crochet added to its beauty and versatility.

By the Victorian era, crochet was a big part of fashion. It was loved for its delicate lace and high society feel.

Why Crochet is Gaining Popularity

Crochet is back in a big way, thanks to the maker movement and sustainable living. Social media has helped spark new interest. Today’s crafters are exploring new stitches and techniques.

High fashion has also taken notice, with brands like Fendi and Missoni using crochet. This shows that artisanal skills are valued in luxury fashion.

The DIY culture and crochet’s calming effects are also key. It’s great for fashion and decor, and it helps people relax. You can make everything from cozy scarves to bold fashion statements.

Essential Crochet Supplies for Beginners

Starting your crochet journey is exciting and a bit daunting. But with the right supplies, you’ll find it easy to create beautiful projects. Whether it’s a warm scarf, a cozy blanket, or cute amigurumi, having the right tools is key.

First, you’ll need crochet hooks. Beginners should start with ergonomic hooks in sizes G6 (4.25 mm) or H8 (5.00 mm). These are made of aluminum or bamboo, which are lightweight and durable. They’re great for various projects and comfortable for long sessions.

For crochet yarn, beginners should choose medium-weight yarns, also known as worsted weight. Bernat Maker Home Dec or Swish Worsted are good choices. They’re easy to handle and come in many colors. They also help you see your stitches clearly, making it easier to learn and spot mistakes.

  • Crochet hooks: Choose ones that fit well in your hand to avoid getting tired. Aluminum hooks are smooth, while bamboo is warm and light.
  • Yarn: A medium-weight acrylic or cotton yarn in a light color is best for beginners. It makes it easy to see and count your stitches.
  • Yarn needle and scissors: You’ll need these for finishing off your projects and weaving in ends.
  • Stitch markers: These are great for marking important spots in your project. They help keep your work consistent.
  • Measuring tape: This is important for keeping your projects the right size, especially for things you can wear.

These supplies will help you through many projects, from your first to your fiftieth. Knowing how to match your hook size with the yarn weight, as shown on the yarn label, will improve your results.

In summary, choosing the right crochet supplies makes crafting smoother and more fun. With the right tools like ergonomic hooks and durable yarn, your crochet journey will start well. Happy crocheting!

Selecting the Right Yarn and Hooks

Choosing the right yarn and hooks is key for crocheters. The right crochet yarn and crochet hooks make your project look and feel great. They also make crocheting more fun and easy.

Understanding Yarn Weights and Materials

The crochet yarn world has many options, each with its own feel. Yarn weight is important for picking the right crochet supplies. Let’s look at the main categories:

Yarn Type Weight Category Wraps Per Inch (WPI)
Lace Weight 0 Extremely fine
Fingering 1 14-16
Sport 2 12
DK/Light Worsted 3 10-11
Worsted/Aran 4 8-9
Bulky 5 7
Super Bulky 6 5-6
Jumbo 7 4 or fewer

Beginners should start with medium-weight yarns like Worsted or Aran. They are easy to work with and show stitches well.

Matching Crochet Hooks with Yarn

Choosing the right crochet hooks is just as important. The hook size should match the yarn weight for the right stitches. Here’s a guide for common yarn weights:

  • DK Yarn: Use a 4mm hook
  • Chunky Yarn: Go with a 6-7mm hook
  • Super Chunky Yarn: Need 8mm or bigger hooks

Every yarn label has a recommended hook size. This helps beginners get the best results. Using the wrong hook size can change your project’s look and size a lot.

But, don’t be afraid to try different hooks. You might like a looser or tighter fabric. It’s all about what you prefer.

So, the key is the right crochet supplies, some knowledge, and lots of creativity. Happy crocheting!

How to Hold Your Crochet Hook Like a Pro

Learning to hold your crochet hook right is key for comfort and skill. It’s especially important when you’re trying out different stitches in tutorials. There are two main ways to hold your hook: the Pencil Grip and the Knife Grip. Each has its own benefits and suits different people’s comfort levels.

The Pencil Grip is great for those who like precision. It’s like holding a pencil. It’s perfect for detailed stitches where you need tight control. On the other hand, the Knife Grip has your palm facing down. This can be more comfortable for longer crochet sessions.

It’s important to remember, there’s no one right way to hold a crochet hook. What matters most is what feels right in your hand. Trying out both grips can make crocheting more comfortable. It also helps you handle different yarns better, which is key for even stitches.

Let’s compare these grips to see which might be better for you:

Grip Type Advantages Best for Notes
Pencil Grip Greater control for intricate stitches Complex patterns requiring precision Can be tiring for long crochet sessions
Knife Grip Comfortable for lengthy projects Larger projects or faster crochet stitches May not offer as much precision

I’ve found switching between grips based on the project works well. For detailed lace, I use the Pencil Grip for precision. For big blankets, the Knife Grip helps avoid hand fatigue. Both grips are essential in my crochet collection.

Getting good at these grips takes time and practice. Try both with different yarns and hooks to find what works best for you. Enjoy the learning process and adjust as you improve your skills with various tutorials.

How to hold crochet hook

Sharing your crochet journey on forums or groups like Crochet’dy Bunch can be helpful. It’s a chance to get advice and support from others. Remember, there’s no wrong way to crochet—just the way that feels right for you. Happy crocheting!

Mastering the Basic Slip Knot and Chain Stitch

Starting your crochet projects means learning the basics first. The slip knot and chain stitch are key to most patterns. Knowing these basics is essential for starting any project right.

Creating Your First Slip Knot

The slip knot is a crucial first step in crochet. It’s used to start every project. To make one, create a loop with your yarn, keeping the tail short for easy handling.

Put your crochet hook through the loop and pull the yarn tight but not too hard. This way, you can still move the hook around. Remember, the slip knot itself is not counted as a stitch.

Techniques for Crocheting the Chain Stitch

The chain stitch comes next after the slip knot. It’s the base row for many patterns. It helps set the length of your work.

To make a chain stitch, yarn over the hook and pull through the loop. Keep doing this until you reach the length you want. It can be tricky to keep the tension even, but it’s key for neat projects.

Many people ask for crochet tutorials, especially for the slip knot and chain stitch. Beginners usually take a week to get the hang of making a slip knot. It shows how important it is in crochet.

Most tutorials focus on hands-on practice and clear steps. This makes learning easier. Almost all basic patterns start with a chain stitch, showing its importance.

Every technique you learn helps you tackle more complex projects. With practice, you can turn simple yarn into beautiful items. Keep going, and every stitch brings you closer to your crochet goals.

Exploring the Basics of How to Crochet

Welcome to the basics of crochet that every beginner needs. Learning these first steps is key to making beautiful projects. We’ll cover the essential stitches and techniques, starting with the basics and moving on.

Learning the Single Crochet Stitch

The single crochet stitch is a must-know for beginners. It starts with inserting your hook into the foundation chain. Then, you do a yarn over, pull through to make a loop, yarn over again, and pull through both loops. This stitch makes a dense fabric, great for many projects.

For more on the single crochet and other basics, check out this guide to crochet. It’s perfect for beginners.

Advancing Towards Double Crochet and Beyond

Once you get the hang of the single crochet, try the double crochet. It’s taller and airier, thanks to an extra yarn over. It’s great for quick projects like scarves and blankets. As you get better, moving on to half-double and treble crochet will be easy.

crochet stitches

Remember, practice makes perfect. The more you try different stitches, the better you’ll get. Start with small projects like a dishcloth or a simple scarf to build your confidence.

Here’s a quick guide to get you started:

Material Recommendation Approximate Cost
Crochet Hook 5.5mm for worsted, 6.5mm for bulky $5 – $10
Yarn Lion Brand Heartland, Red Heart Soft $5 – $10 per skein
Additional Tools Scissors, darning needle, stitch markers $5 – $10 total

Joining groups like the TLYC Makers Facebook group can help. It has over 20,000 crochet fans. Crocheting is about making art that shows your style.

Developing Even Tension and Neat Stitches

Sharing crochet techniques and project details is something I love. Achieving even tension is key for neat stitches. It’s a skill that greatly affects your crochet’s look and quality. Let me show you how to keep your tension even and make beautiful crochet pieces.

Maintaining consistent yarn tension is more than just how you hold the yarn. It also depends on the tools and methods you use. A yarn bowl can greatly improve yarn management. It ensures the yarn unwinds evenly, which is vital for even stitches and accurate sizes.

Many beginners find it hard to hold the yarn right. Hold the yarn over your non-dominant hand’s index finger. This helps control tension and guides the yarn smoothly to the hook. You’ll find a yarn-holding method that suits you best over time.

  • Watching crochet tutorials on different yarn holding techniques can be very helpful for beginners.
  • Try both knife and pen hold positions for the crochet hook to see what feels natural for you.
  • Tools like tension rings or yarn guides can help keep your tension even in your project.

Beginners should start their foundation chain with a larger crochet hook. This prevents a tight and stiff foundation chain. With consistent practice and these adjustments, your crochet skills will improve.

Mastering crochet isn’t just about using the hook and yarn. It’s about patience and persistence. Keep practicing, learn from each project, and don’t be afraid to try new techniques.

Decoding Crochet Patterns and Terminology

Starting your crochet journey means learning more than just how to use a hook and yarn. You also need to understand the special language of crochet patterns. These patterns help you make everything from simple scarves to complex afghans. Knowing the terms and symbols is key, whether you’re new or want to improve your skills.

Understanding the Language of Crochet Patterns

Crochet patterns use short codes and symbols to save space and make following easier. For example, Ch means chain, Sl st is slip stitch, and Sc is single crochet. Knowing these abbreviations can make your crafting faster.

You’ll also see Inc for increase, Dec for decrease, and Turn, Join, and Rep for repeat. These terms help you do the right steps. Symbols like asterisks (*), brackets [ ], and parentheses ( ) help organize the pattern. They’re key for keeping the right stitch count and pattern look.

American vs. British Crochet Terms

There’s a difference in crochet terms between America and Britain. For example, the American single crochet (sc) is like the British double crochet (dc). It’s important to know which terms a pattern uses. This helps you follow patterns from different places and share crochet techniques worldwide.

Whether you’re starting with your first pattern or working on a complex one, knowing the terms is crucial. Each pattern and project you do makes you better at crochet.

Gaining Confidence with Simple Projects

Starting to crochet can be thrilling and scary at the same time. But, the best way to grow your skills is by beginning with simple projects. These projects help you build your skills slowly and make learning fun.

Starting with Easy Crochet Projects

Simple projects let you practice basic stitches without feeling too stressed. A great first project could be a colorful scarf or a cozy blanket. These projects use single crochet stitches and don’t need complicated patterns or stitch counting.

Ideas for Your First Completed Pieces

  • Granny Squares: Perfect for beginners, Granny Squares help you keep your stitches even and manage turning chains. They can be joined to make bigger items like blankets or cushion covers.
  • Coasters and Dishcloths: Start with small, square projects to feel a sense of achievement quickly. These projects are practical, too!
  • Simple Hats and Mittens: These projects teach you skills like stitching in rounds and decrease stitches. They prepare you for more complex patterns.
  • Amigurumi: These small stuffed animals or figures are delightful projects that blend crochet and creativity, using the magic ring technique.

Remember, every completed project, no matter how simple, boosts your confidence and skills. I encourage you to cherish each stitch and the personal touch you bring to your creations.

Conclusion

As we finish our guide on how to crochet, let’s look back at what we’ve learned. If you feel lost, remember, mastering crochet takes time. Many beginners find it helpful to have a guide, showing the value of a mentor.

The world of crochet is always changing. More people are using bright yarns and learning online. This shows how digital tools can help grow the craft beyond old limits.

Now, let’s look at some interesting facts about crochet:

Statistic Details
Preferred Learning Mode Online tutorials are now chosen by a substantial segment of new crocheters over in-person lessons.
Yarn Preference Scheepjes Whirl is preferred by a notable percentage, showcasing brand loyalty in crochet materials.
Pattern Complexity A considerable percentage of crocheters challenge themselves with intricate patterns like Mandala Madness.
Usage in Industries Fashion, home decor, and art remain the leading industries that incorporate crocheted items, reflecting their functional and aesthetic value.
Popular Culture Influence Significant impact noted from trends like Baby Yoda and Star Wars on crochet projects.

Crochet is all about expressing yourself and being creative. Whether you’re starting out or want to try more complex projects, there’s always something new to learn and make.

Enjoy every step of the way, from each yarn loop to every pattern. Crochet is more than a skill; it’s a hobby that brings warmth to our lives and the lives of those around us.

[Reserved for additional content not outlined]

Starting your crochet journey is exciting. It’s not just about learning the basics. It’s also about understanding the details that bring your projects to life. Knowing abbreviations like ch (chain), dc (double crochet), and sl st (slip stitch) is key. These are the foundation of complex designs.

Don’t skip the gauge swatch. It might seem like an extra step, but it’s crucial. Make your swatch a bit larger than the pattern suggests. This ensures your stitches are accurate and consistent.

Seeing your crochet come together is thrilling. It’s especially true when you’ve followed step-by-step double crochet instructions carefully. Reviews often mention the importance of progress pictures. They help guide you and boost your confidence.

Measuring gauge correctly and providing detailed yarn information are essential. They help your project fit perfectly. For continuous crochet squares, increase your stitch count by two on each side. This keeps your work flat and even.

Whether you’re making a simple 3-round square or a more complex piece, remember to skip the first stitch. This trick ensures your square is perfect. Exploring crochet tools, like a 6 mm Clover Amour hook, can make a big difference. It makes your stitches smoother and faster.

The magic ring technique is also worth trying. It’s durable and adds to your skill set. When you complete the final round with 42 stitches, you’ll see the value of these tips in your work.

FAQ

What do I need to begin learning how to crochet?

You’ll need some basic supplies like crochet hooks and yarn. You might also want stitch markers, a yarn needle, and scissors. Start with a medium-weight yarn and a G6 or H8 hook for beginners.

Why is crochet experiencing a resurgence in popularity?

Crochet is becoming popular again as a hobby. It’s seen as a way to relax and express your style. It’s also a form of mindfulness and a break from screens. The DIY movement and love for handmade items have also helped.

How do I select the right yarn and hook for my crochet project?

Choose a medium-weight yarn, marked as a 4 on the label. It’s easier for beginners. Check the yarn label for the right hook size, usually a G6 or H8. This ensures the best results.

What is the best way to hold a crochet hook?

There are two ways: the pencil grip and the knife grip. Hold the hook like a pencil or in a fist-like fashion. Try both to see what feels more comfortable and gives you better control.

How do I make a slip knot and chain stitch?

To make a slip knot, loop the yarn and pull through to tighten. For the chain stitch, yarn over and pull through the loop on your hook. Repeat this to create a chain. Keep your tension even for consistent stitches.

What basic crochet stitches should a beginner learn first?

Start with the single crochet stitch. It’s key for many patterns. Once you’re good at that, learn the double crochet stitch. It opens up more project options and textures.

How do I maintain even yarn tension while crocheting?

Wrap the yarn over your non-dominant hand’s index finger. This helps control the tension. It may take practice, but finding a rhythm is key to even stitches.

How do I read crochet patterns and understand the terminology?

Crochet patterns use abbreviations like SC and DC. Learn these and familiarize yourself with American and British terms. Always check the pattern’s terminology before starting.

What are some easy projects for a crochet beginner?

Start with simple projects like scarves, washcloths, or blankets. Use single crochet stitches. As you get better, try a Granny Square. It’s a bit more complex and helps with changing yarn colors and counting stitches.

Source Links